This book will focus on using R for data analysis, but we aren’t going to start with learning R. Instead we are first going to learn git. What is a git, you ask? Git is a version control system. If you have never used a version control system before, it will initially seem esoteric and confusing. However, after a bit of practice you will quickly see the many benefits of using a version control system in your work.
Version control systems allow you to track changes to files within a directory and to distribute changes to files to other collaborators. They also allow you to revert changes and to merge any changes made by different collaborators. Version control systems have been used by developers for decades to manage collaborative projects and to keep track of changes.
For academics, version control systems have a lot to offer. This is particularly true for academics doing quantitative work, because much of our daily workflow resembles that of developers. We write code, edit code, and work with our collaborators. Briefly here are some of the benefits of implementing version control for your projects.
Keep a research log
All changes to your project are “committed” to a repository with a brief description of your changes. You can look over the history of these commits to get a record of all the things you have done on your project.
Nothing is lost
All changes that you commit to your repository are recoverable. If you realize that the code you changed isn’t working right, you can easily revert back to a prior commit or find the text/code that was changed and get it back.
Keep files tidy
The typical project folder for most academics will contain multiple versions of the same document, perhaps entitled something like “paper-1.docx”, “paper-v2.1_06272017.docx”, “paper_conference_revision.docx”, “paper_FINAL.docx”, “paper_FINAL_REALLY_THIS_TIME.docx”, and so on. Similarly, scripts are often littered throughout the directory without a clear indication of what scripts will do what and which ones are actually essential to the project. This is a mess. With version control, all of that messiness can go away. Because all changes are tracked by the version control system, there is no need to hang on to older versions of files.
Collaborate intelligently
Because changes can be shared among multiple users, version control systems make collaboration much simpler. I don’t have to hunt through my emails to find a version of the file that my co-author sent me. I don’t have to remember to send out my changes to everyone and hope they also didn’t make changes. I just “push” my changes directly and “pull” in the changes of others.
Back up your system
If you push your changes to another repository (highly encouraged), then you effectively back up your project. It also makes it easy to work on the same project across multiple computers because you can push and pull changes between the computers.
Introduction to Git
Git is a version control system designed by the legendary open-source programmer Linus Torvalds. It has become the de facto standard for version control in recent years. It is open-source, lightweight, free to use, and runs on all major platforms.
Git should not be confused with a commercial service like GitHub. GitHub provides users with remote git repositories for sharing and collaborating on projects, but it is not git itself.
Git itself is a command-line program, which means you type in commands to a terminal, but I am going to primarily show you how to interact with it through the RStudio interface. However, all of the basic commands that I will discuss below can be run by opening up a console/terminal on your operating system and typing them in. At the bottom of this document, I discuss the basic commands you can run from the command line with git as well as some additional useful commands.
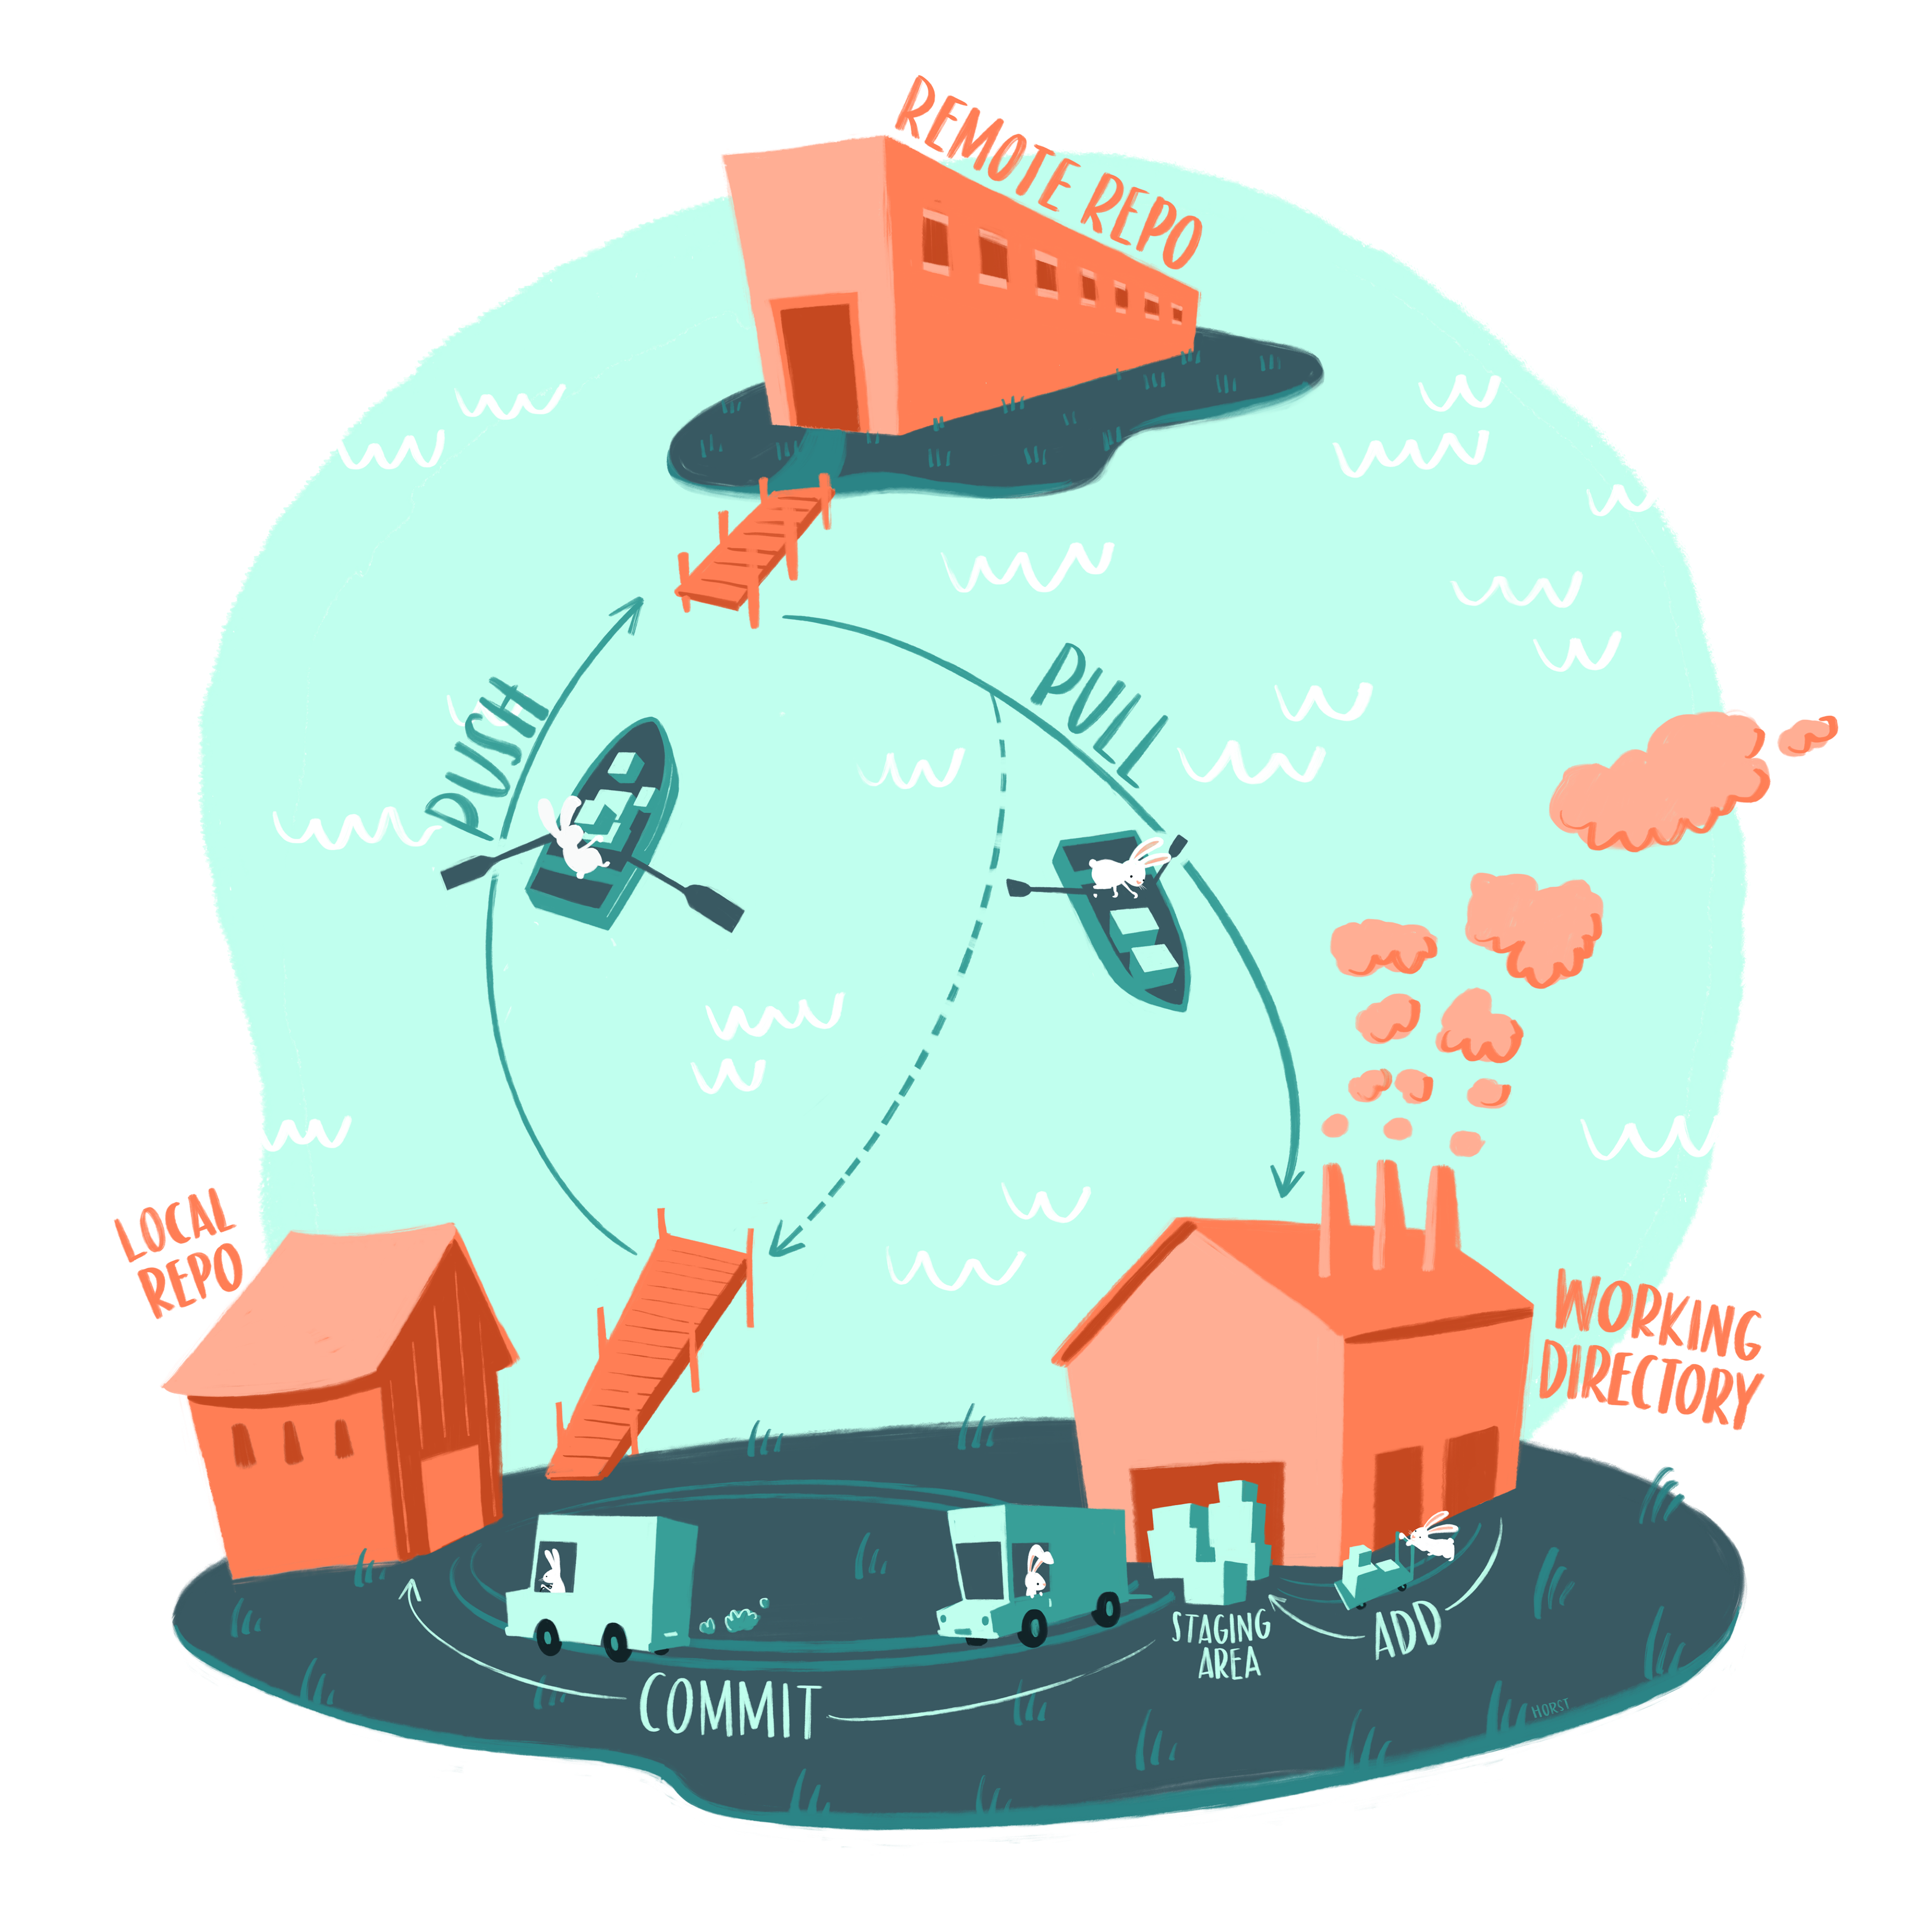
Figure 2.1 shows a basic git workflow as illustrated by the amazing Allison Horst. Lets walk briefly through what this illustration is showing us.
Figure 2.1: A Basic Git Workflow. Artwork by @allison_horst.
We start with our working directory. This is the directory on our local computer that contains all of the files for our project, including scripts, data, and other assorted files. Living inside of this working directory is a local git repository (or “repo” for short). This git repository keeps track of all the files and when it notes that files have been changed, added, or deleted, it will let us know. We can then add those changes to a staging area. When we are ready, we commit all of the changes in the staging area to our local repo. Our local repository will then have a history of all the changes to our project, including a brief commit message that accompanies every commit.
All of this is happening on our local computer. However, we will also have a remote repo somewhere else. In our case, that repo will live on GitHub. That repo may be shared with other collaborators. To ensure that those collaborators get any changes that we have made, we then push all changes from our local repo to the remote repo. Its also possible that our collaborators made changes that we don’t have, so we also can pull changes from the remote repo to our local repo and working directory.
This commit-push-pull routine is the basic git workflow. It all may seem like a lot to take in, but with a little practice, it will quickly become second nature and habitual.
You Should usethis
We are going to use an R package called usethis to simplify some of the tasks involved with setting up git on your local computer. Later in this book, I will talk about R packages in more detail and how to install and use them. For now, you simply need to type the command below into the R console to install the usethis package. You can also see how this process should look illustrated in Figure 2.2.
install.packages("usethis")
Figure 2.2: Installing the usethis package in RStudio
Later instructions will give you similar code using usthis to copy into your R console.
Installing Git
You can install git on your system by downloading the appropriate files here and installing them on your computer. On most computers, this will not give you a graphical client to open, but it will install git “under the hood” of your computer and make it accessible to RStudio. You may need to restart RStudio to get it to recognize your new git installation.
In order to use git properly, you will need to configure it. Most importantly, you need to provide a user name and a user email. This name and email will be associated with any commits that you make.
The easiest way to configure this information is via the usethis package, specifically the use_git_config command. You can copy and paste the command below, changing the name and email as appropriate.
usethis::use_git_config(user.name ="Your Name Here", user.email ="myemail@uoregon.edu")
Sync your email with GitHub
I would recommend that you use the same email as the one you used to register with GitHub as this will help to link your commits on GitHub to your GitHub user name.
While we are here, we will go ahead and run a command called git_vaccinate that will set up some standard files that git should ignore:
usethis::git_vaccinate()
You can check to make sure your configuration was set up correctly with the very useful git_sitrep command.
usethis::git_sitrep()
Figure 2.3 illustrates the process of configuring git and checking the configuration.
Figure 2.3: Initial configuration of git using usethis in RStudio
Connecting to GitHub
If you are taking a course from me, we will use GitHub for shared remote repositories. Its important to keep in mind the distinction between git and GitHub. GitHub is just a service that provides free remote git repositories and a variety of additional bells and whistles like wiki’s and issue tracking (mostly associated with software development, but also useful for researchers). There are other git repository service providers such as GitLab and BitBucket. You can even run remote git repositories off of your own server, if you are daring enough.
When you set up a repository on GitHub, you can decide whether to make it public or private. Public repositories are accessible by anyone on the internet. Private repositories are only accessible by the owner and any specified collaborators.
Pay attention to GitHub file size limits
The maximum size for a single file in a GitHub repository is 100 megabytes. This can create problems because git will allow you to commit a file larger than this size but you will not be able to push it up to GitHub, which means you will have to remove it from your commit history to push. If you are writing a script over 100MB, then you are doing it wrong. However, datasets can often be larger than 100MB. R can usually read datasets that have been compressed (e.g. .zip, .gz, .bz2 extension) so keeping your datasets zipped is a good practice to avoid this problem. For really big datasets, you may need to either break up the dataset or host it somewhere else and read it remotely.
The first step to setting up GitHub is to register a free user account. You can then create unlimited private and public repositories.
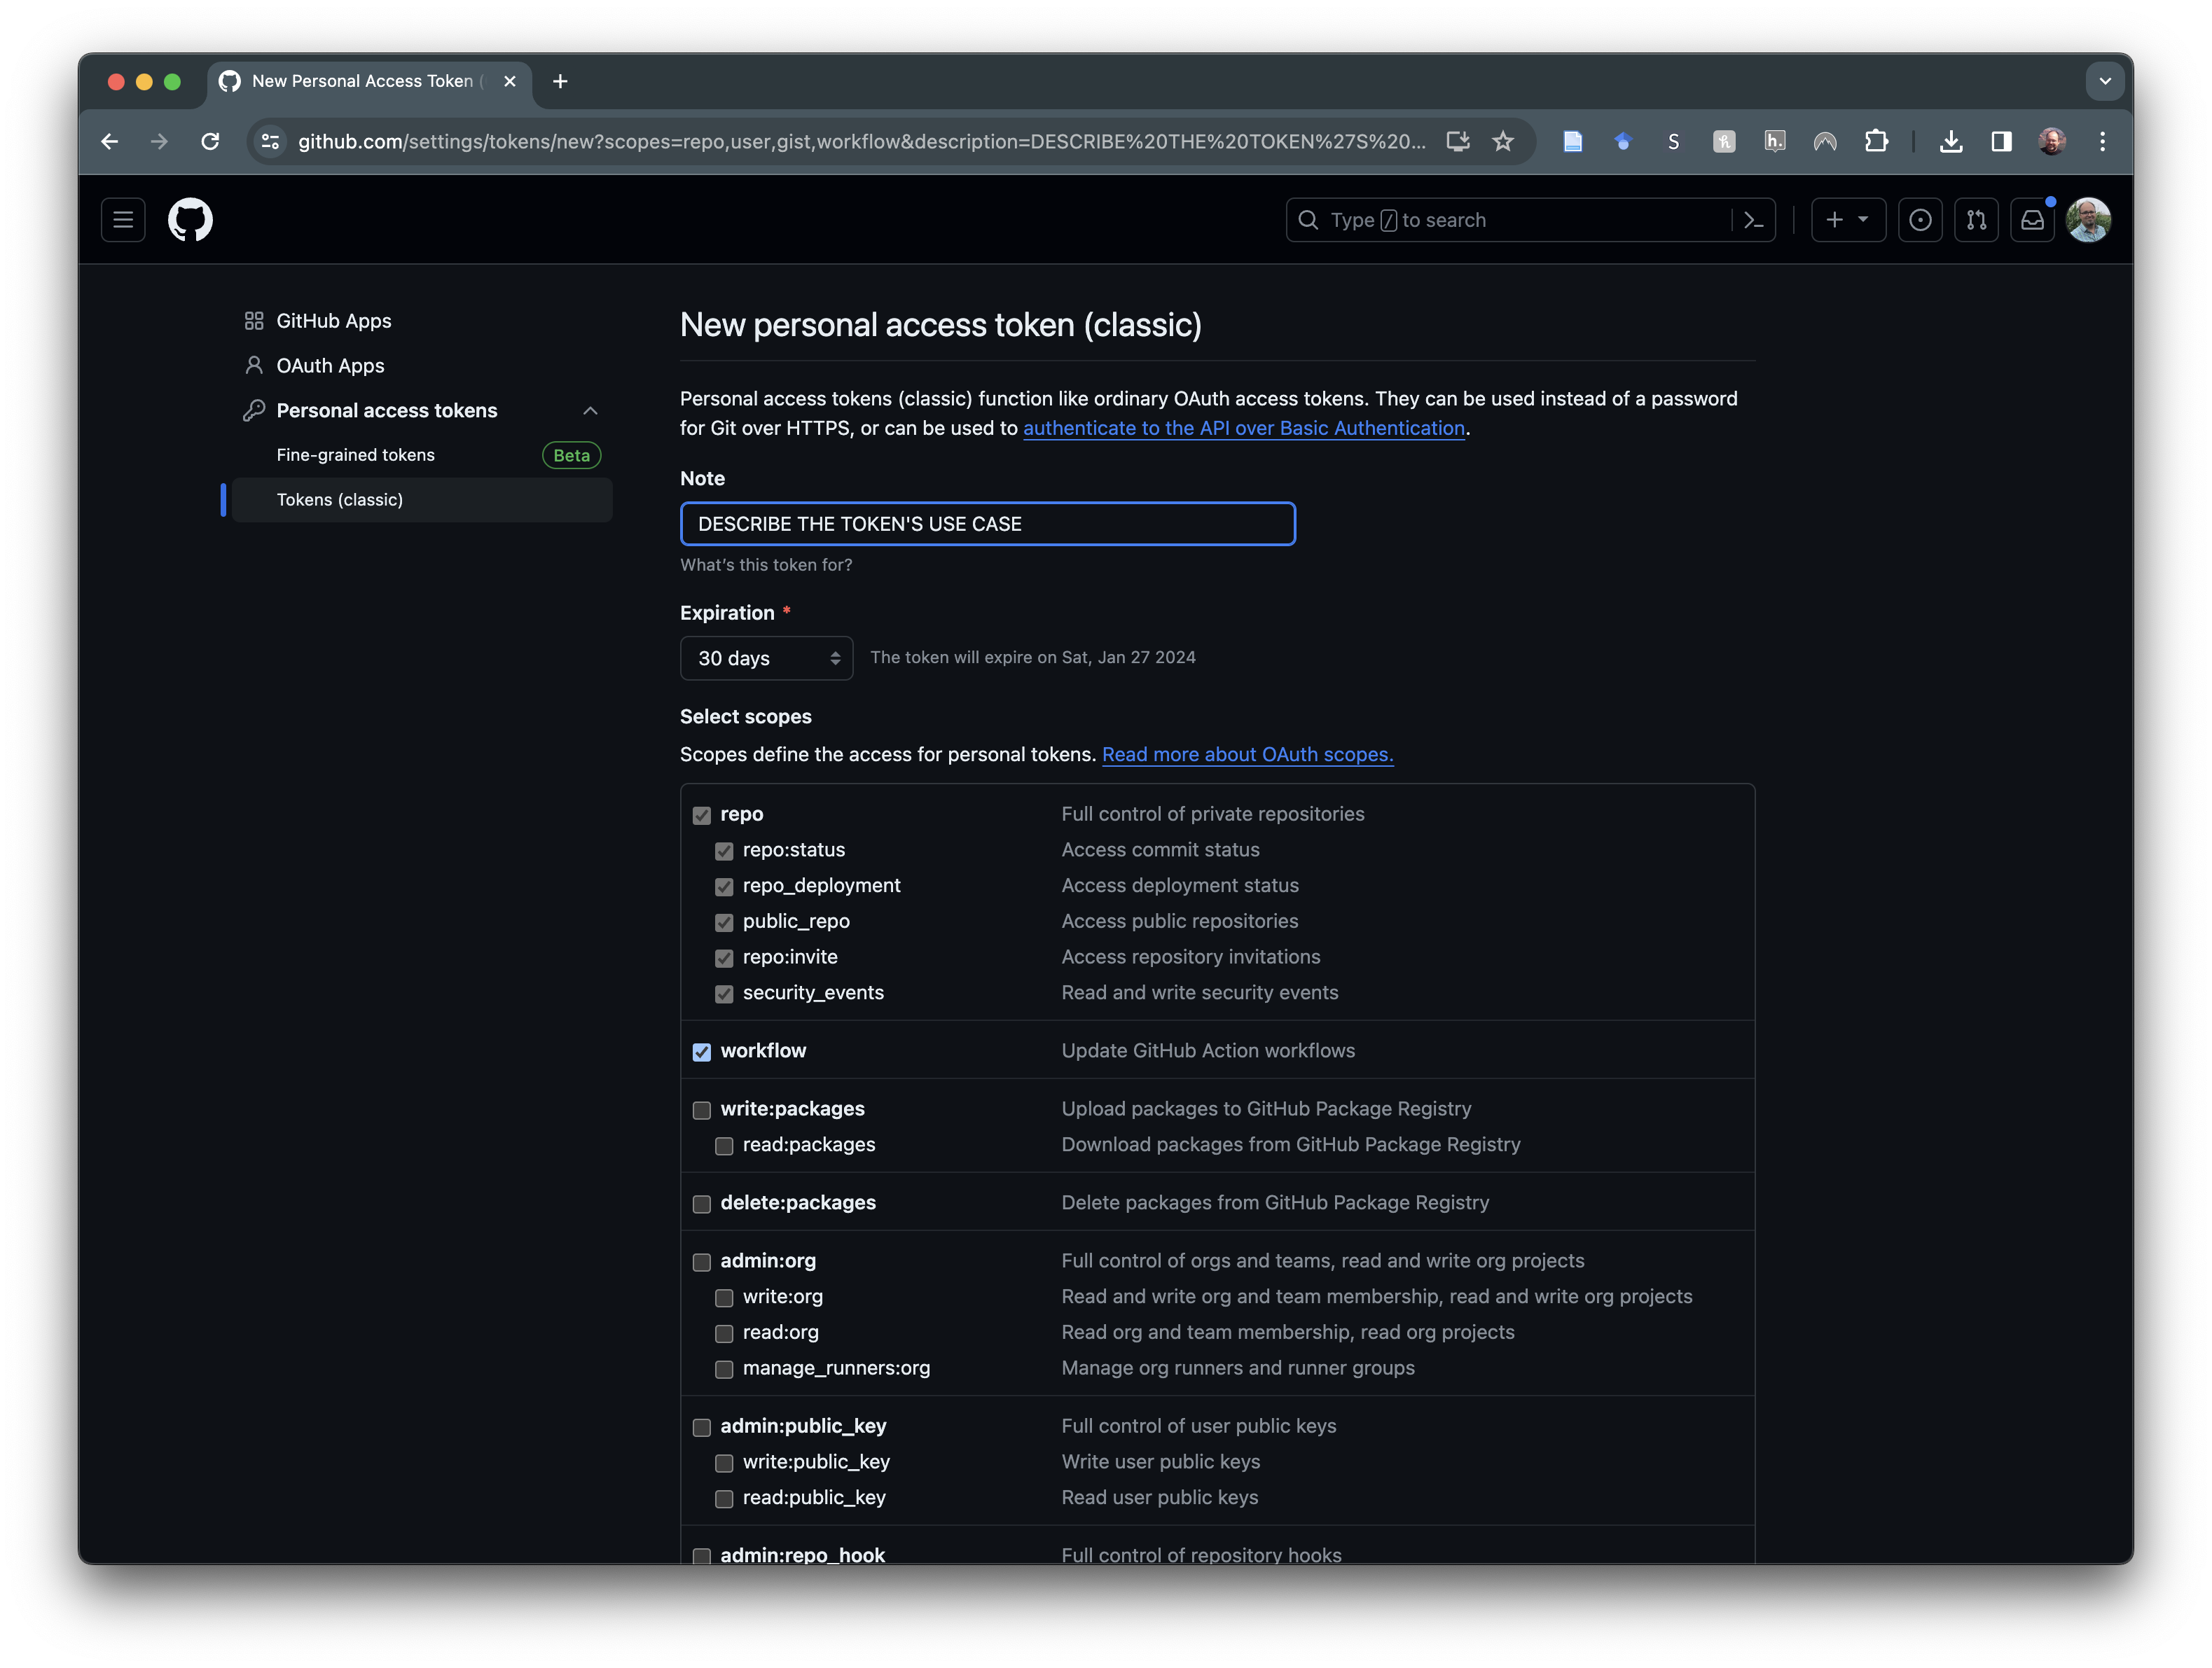
The trickiest part of working with remote repositories on GitHub is authentication. To push or pull with the remote repo, you will need to be authenticated with GitHub. Unfortunately, GitHub no longer allows you to do this by entering your password. Instead, you will need to create a Personal Access Token (PAT) and cache it on your local computer. This PAT has an expiration to it, so you will need to repeat this process periodically (or when you switch to a new computer). However, you can always use the instructions here to help make the process easier.
To set up your PAT, follow these steps. First, from RStudio, enter the following command:
usethis::create_github_token()
This command will open a browser window on GitHub. You may have to log in on the web interface. Once you are logged in, you will be on the page to create a new PAT, which will look something like Figure 2.4.
Figure 2.4: GitHub page for creating a new Personal Access Token. be sure to name it and set an expiration date.
You will want to name your PAT and I would recommend using a longer expiration date than 30 days. You should not need to change any of the scopes as these are set properly by usethis. At the bottom of this page, click the “Generate Token” button and then copy the provided PAT to your clipboard.
Once we have the PAT, we will return to RStudio and type the following:
gitcreds::gitcreds_set()
This will bring up an option to enter the new credentials. When prompted to do so, you will paste in the PAT. Your PAT will then be cached on your local system and you will authenticate with GitHub automatically.
To check that it worked correctly, you can run git_sitrep again:
usethis::git_sitrep()
You should see a line like this:
Personal access token for'https://github.com':'<discovered>'
Cloning a Repository
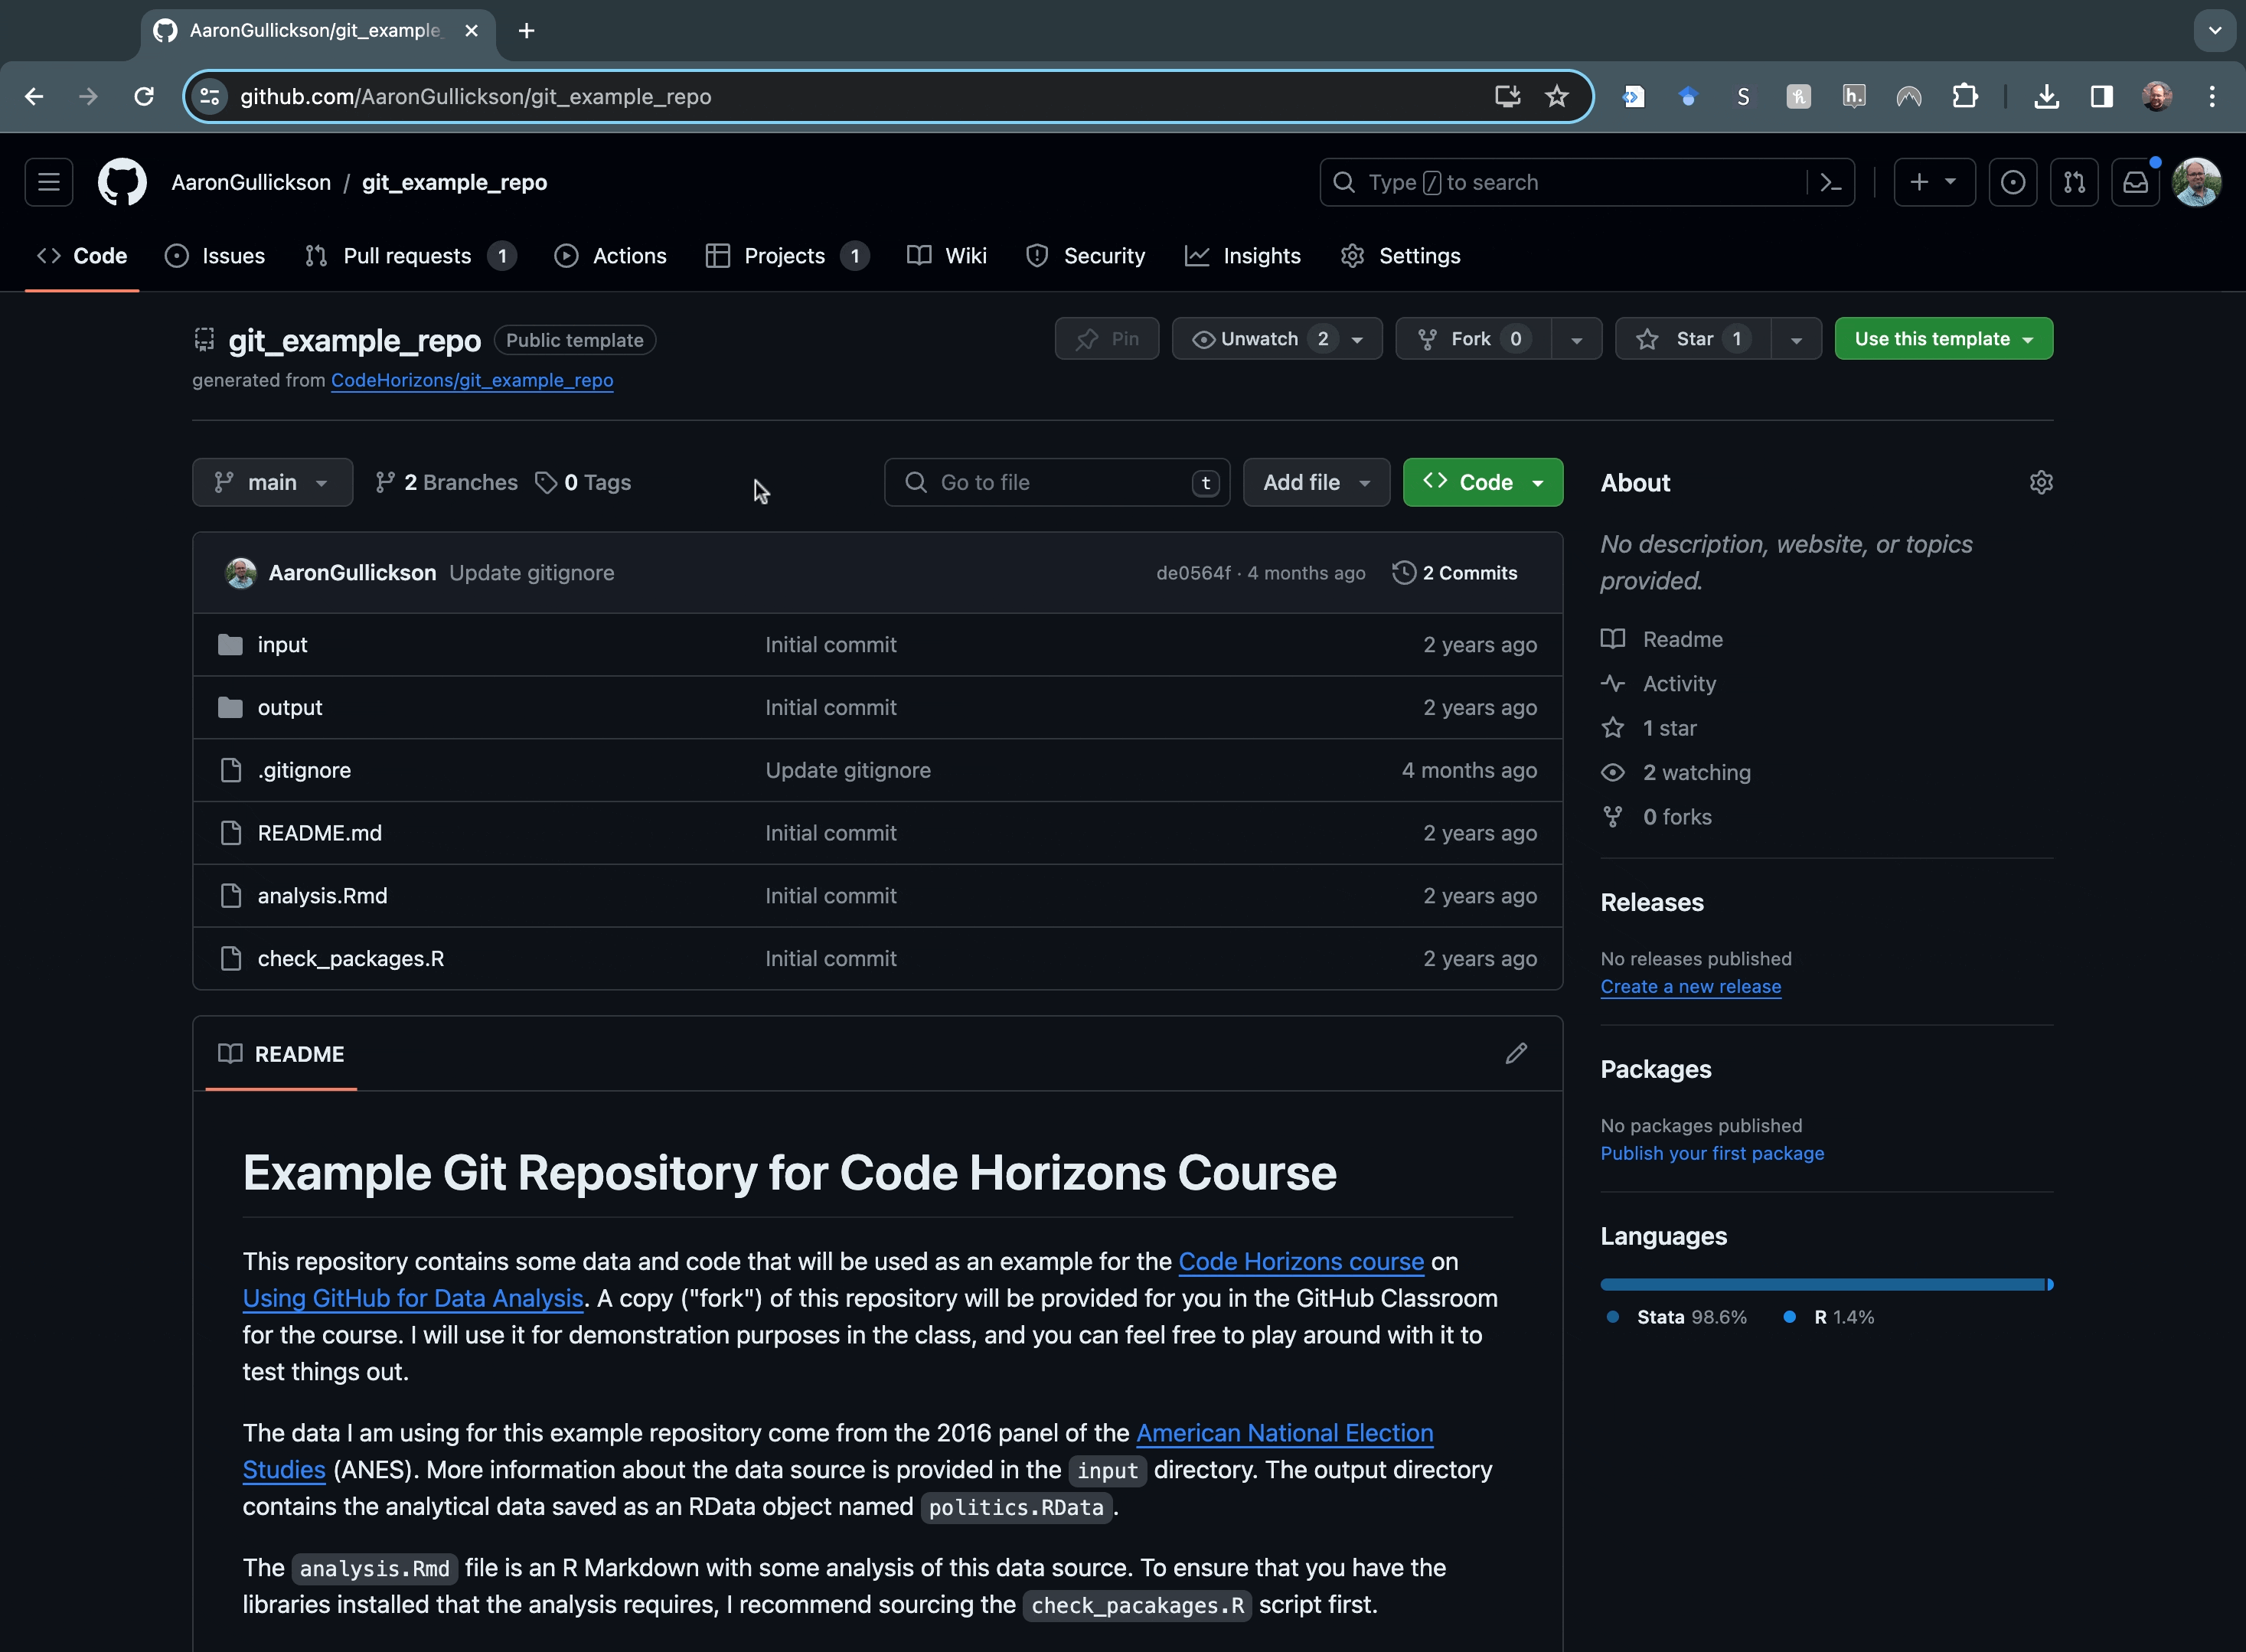
Now that we have everything set up on our local computer and GitHub, we can copy a remote repository on GitHub to our local computer. This process is called cloning. As an exercise, you can try cloning this appropriately named example git repo from my account.
The first step to cloning is to get the address of the remote repository. On the main page of any GitHub repository, you will see a green button titled “Code.” Clicking this button will provide a dropdown with the https address we want. Just copy it as I show in Figure 2.5.
Figure 2.5: Copying the https address of a GitHub repository for cloning.
Now I can use RStudio to clone the repository on my local computer. To do this, we need to create a new project in RStudio. Go to “File > New Project” from the menu (or click the gelatinous cube icon). This will bring up the new project wizard dialog. We will choose the following options: Version Control > Git. From here, you can paste the address we copied earlier. You can also specify a name and location for the project directory. Be sure to remember where you put your git repo! Figure 2.6 illustrates the process of cloning a new repository.
Figure 2.6: Cloning a repository from RStudio. Don’t forget to specify where you want the project to be on your system in the final step.
You now have an identical copy of the repository from GitHub on your local computer. Additionally, the local git repository recognizes the remote repository on GitHub as the “origin” repository and so it will already know where to push and pull.
To use the git tools in RStudio, you will need to open the RStudio project you just created within RStudio. You can do this from the drop down project menu in the upper right of RStudio or from the File menu. The easiest way to open up a project however is to navigate to it in your computer’s filesystem and double click the “*.Rproj” file located in the project directory. This will open up RStudio with the project loaded.
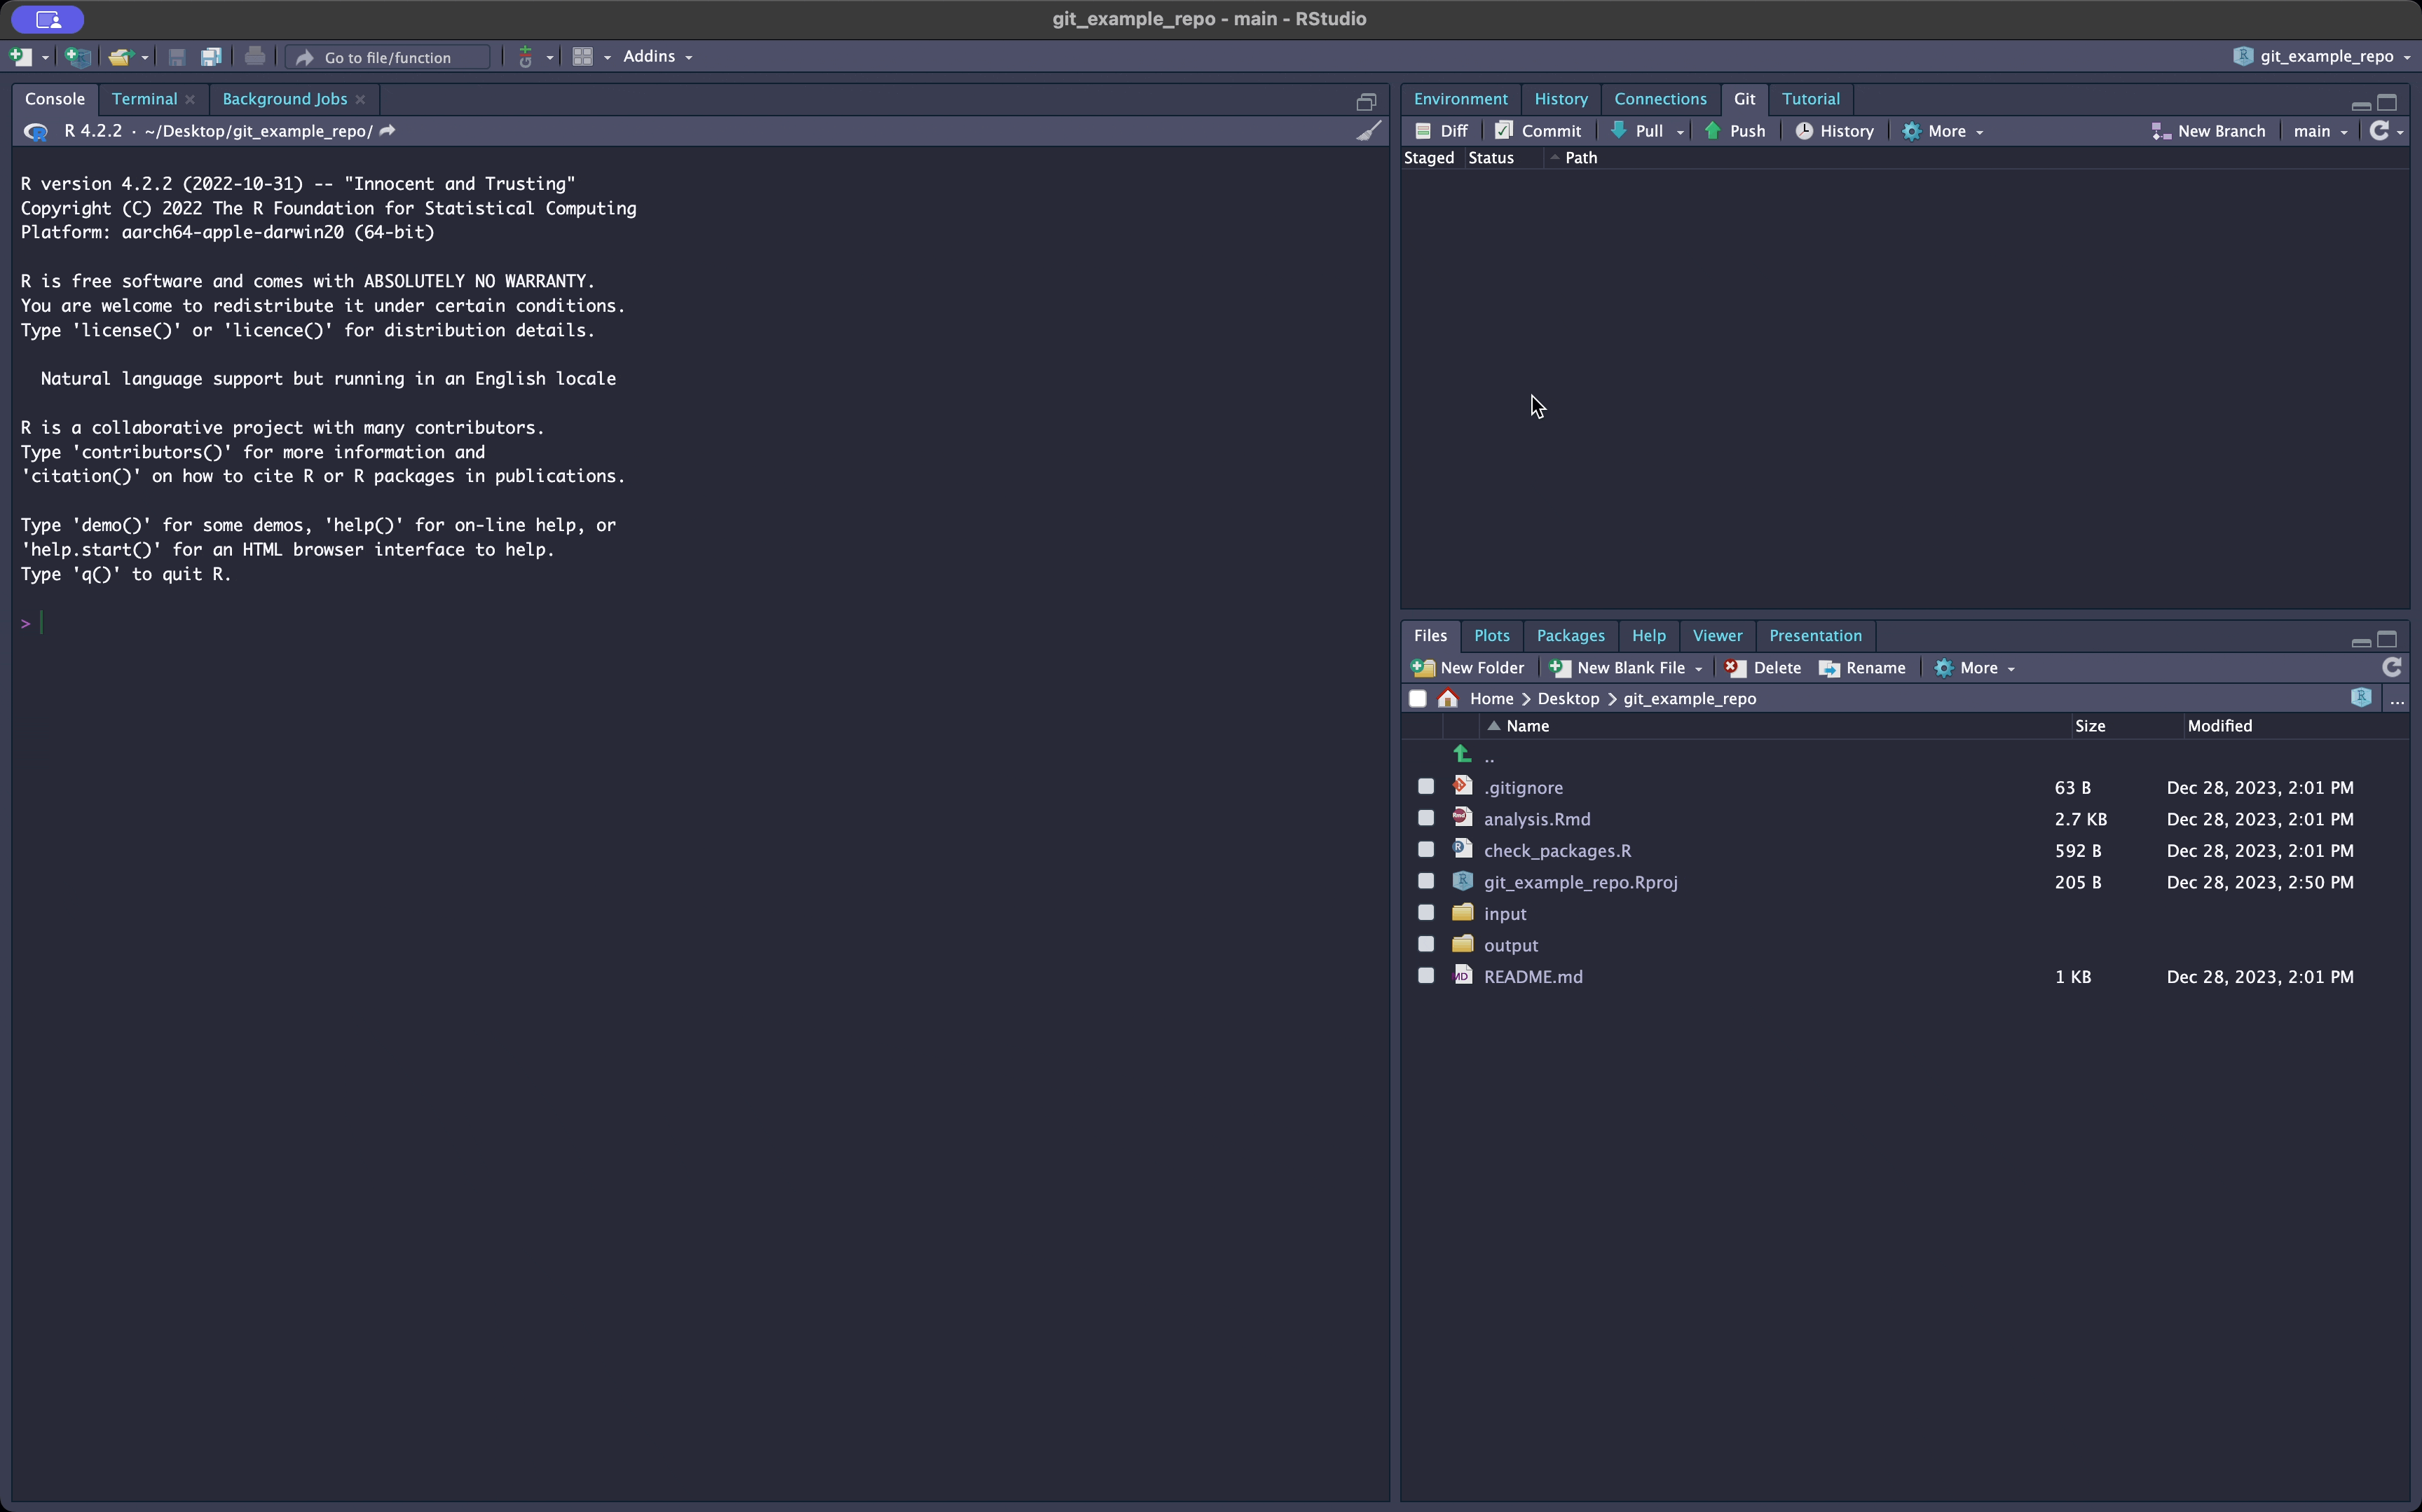
When you are within a project in RStudio, you will see a “Git” tab in the upper right panel. This tab has all the functionality we need for working with git. If you do not see this tab, then you are not in the project and will need to open it up in order to access the project. Figure 2.7 illustrates the process of opening an RStudio project.
Figure 2.7: Opening an RStudio Project in RStudio. Notice that initially no git tab is shown because I am not in my project. Opening the project directly allows me to see the git tab.
The Basic Git Workflow
We are now set up to use the basic git workflow. This workflow is as follows:
Commit changes to your local files to the local repository.
Push committed changes from the local repository to the remote repository.
Pull other changes from the remote repository to your local repository.
Lets dive into each of these elements in detail.
Commit Changes
Any time you make a change to a file in your project directory, that change will be noted by git. However, the change will not be automatically added to your repository. To get those changes to show up in the repository, you have to commit those changes. You can commit changes from multiple files in a single commit. When you make the commit you will also write a brief commit message about those changes.
It is best to make commits in small logical chunks. A single commit shouldn’t include changes that are doing several different things at once. This will make it easier to read and understand your commit log later and it will also make it easier to back out changes you made if you decide you don’t like them. A poor approach, but often common among novices, would be to simply commit everything you worked on over the day in one big batch. Your future self will not appreciate this approach! Instead, make it a habit to commit regularly, as you move from one task to another, so that the commits have a logical structure.
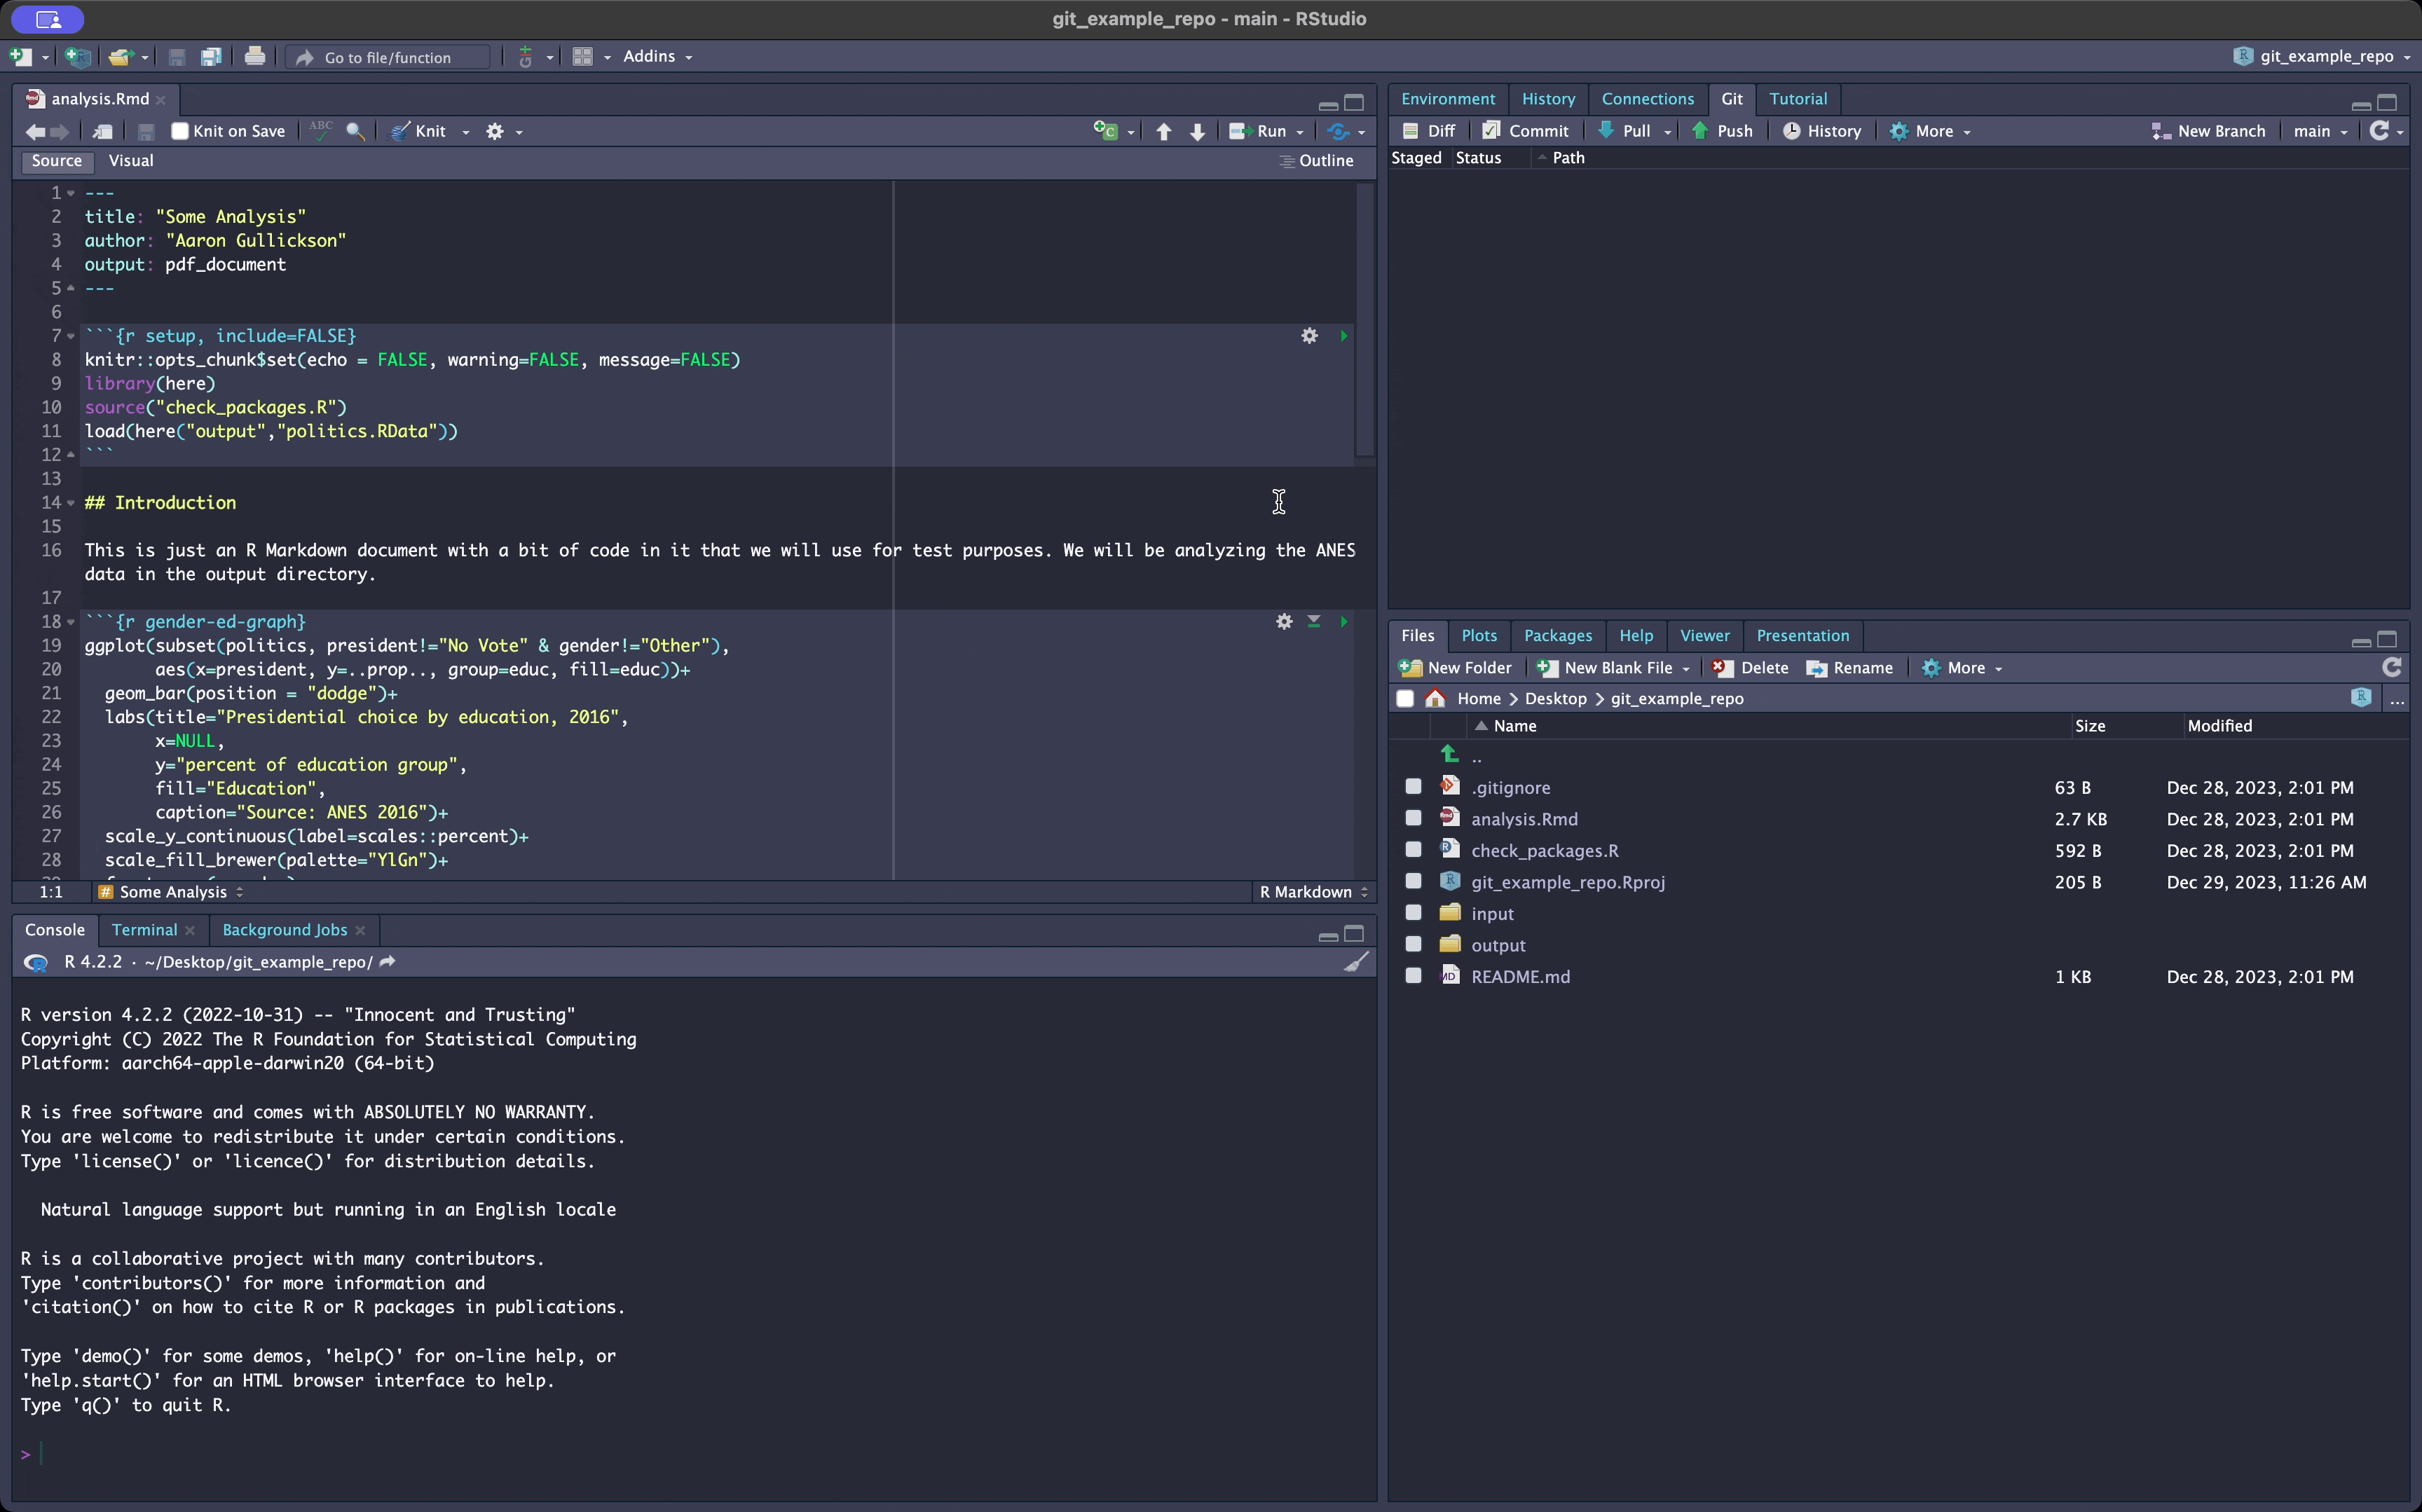
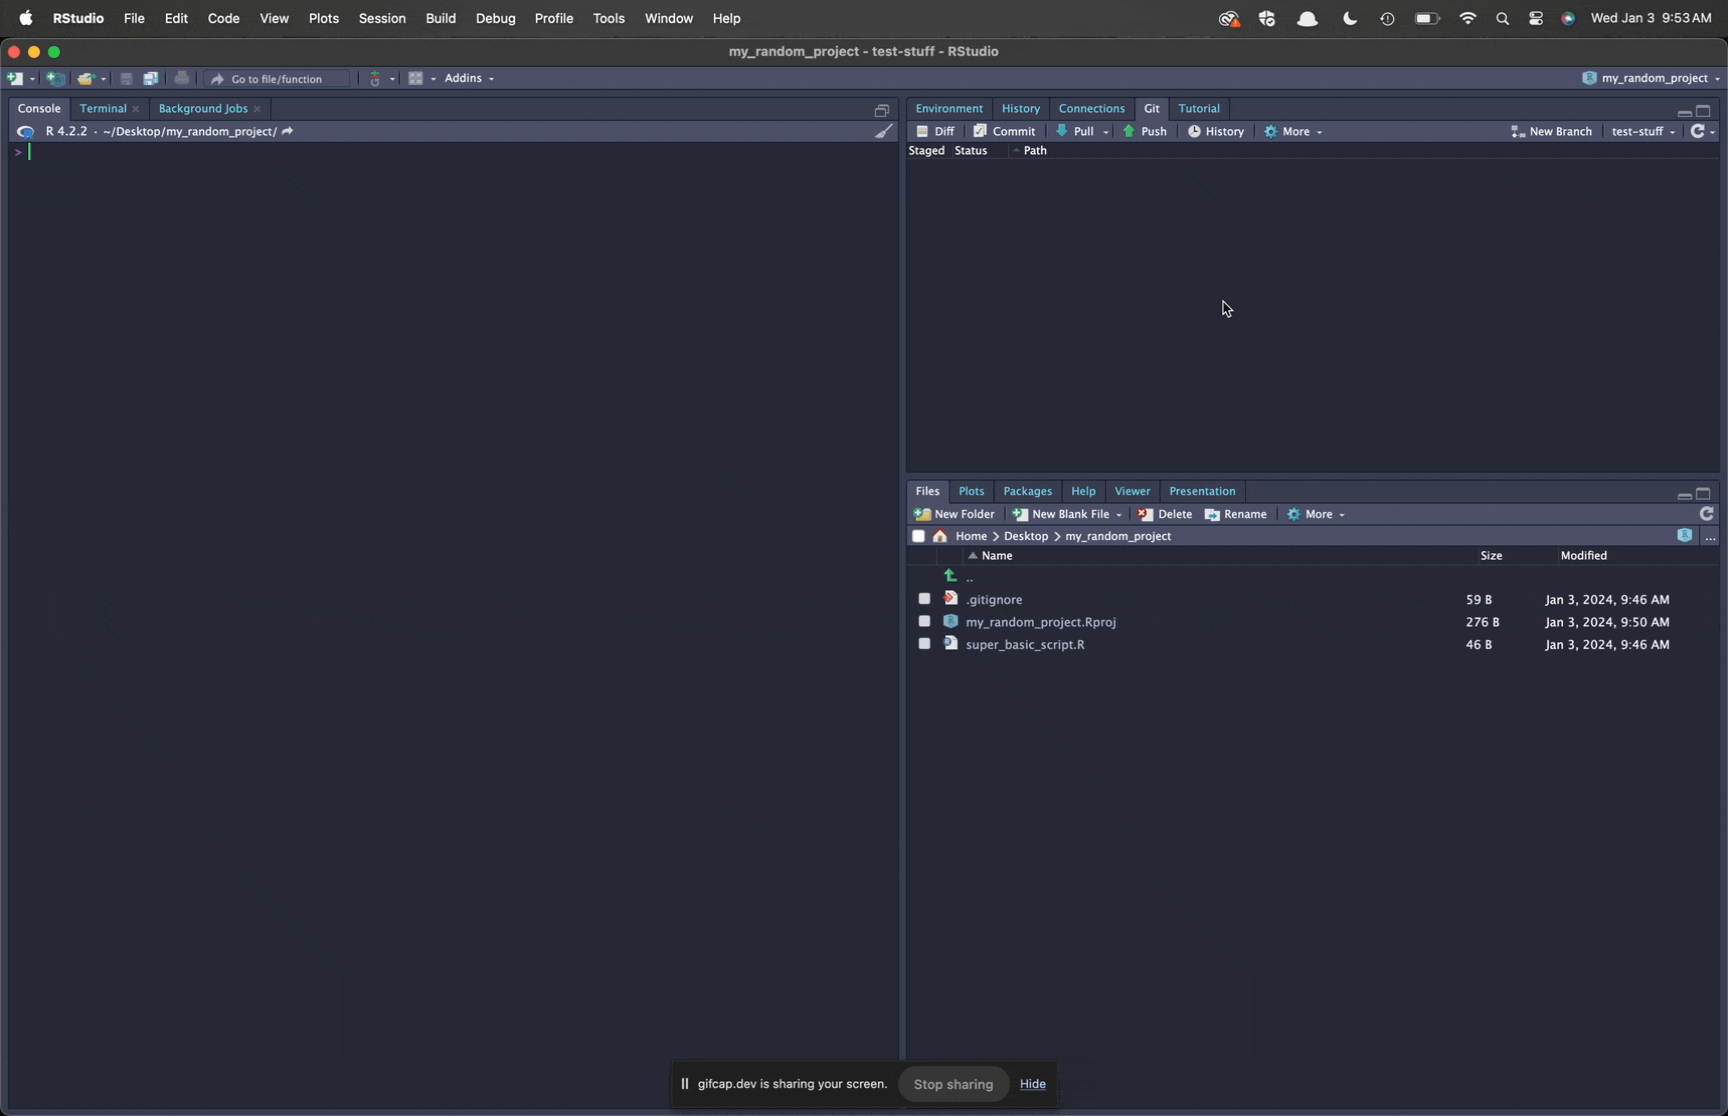
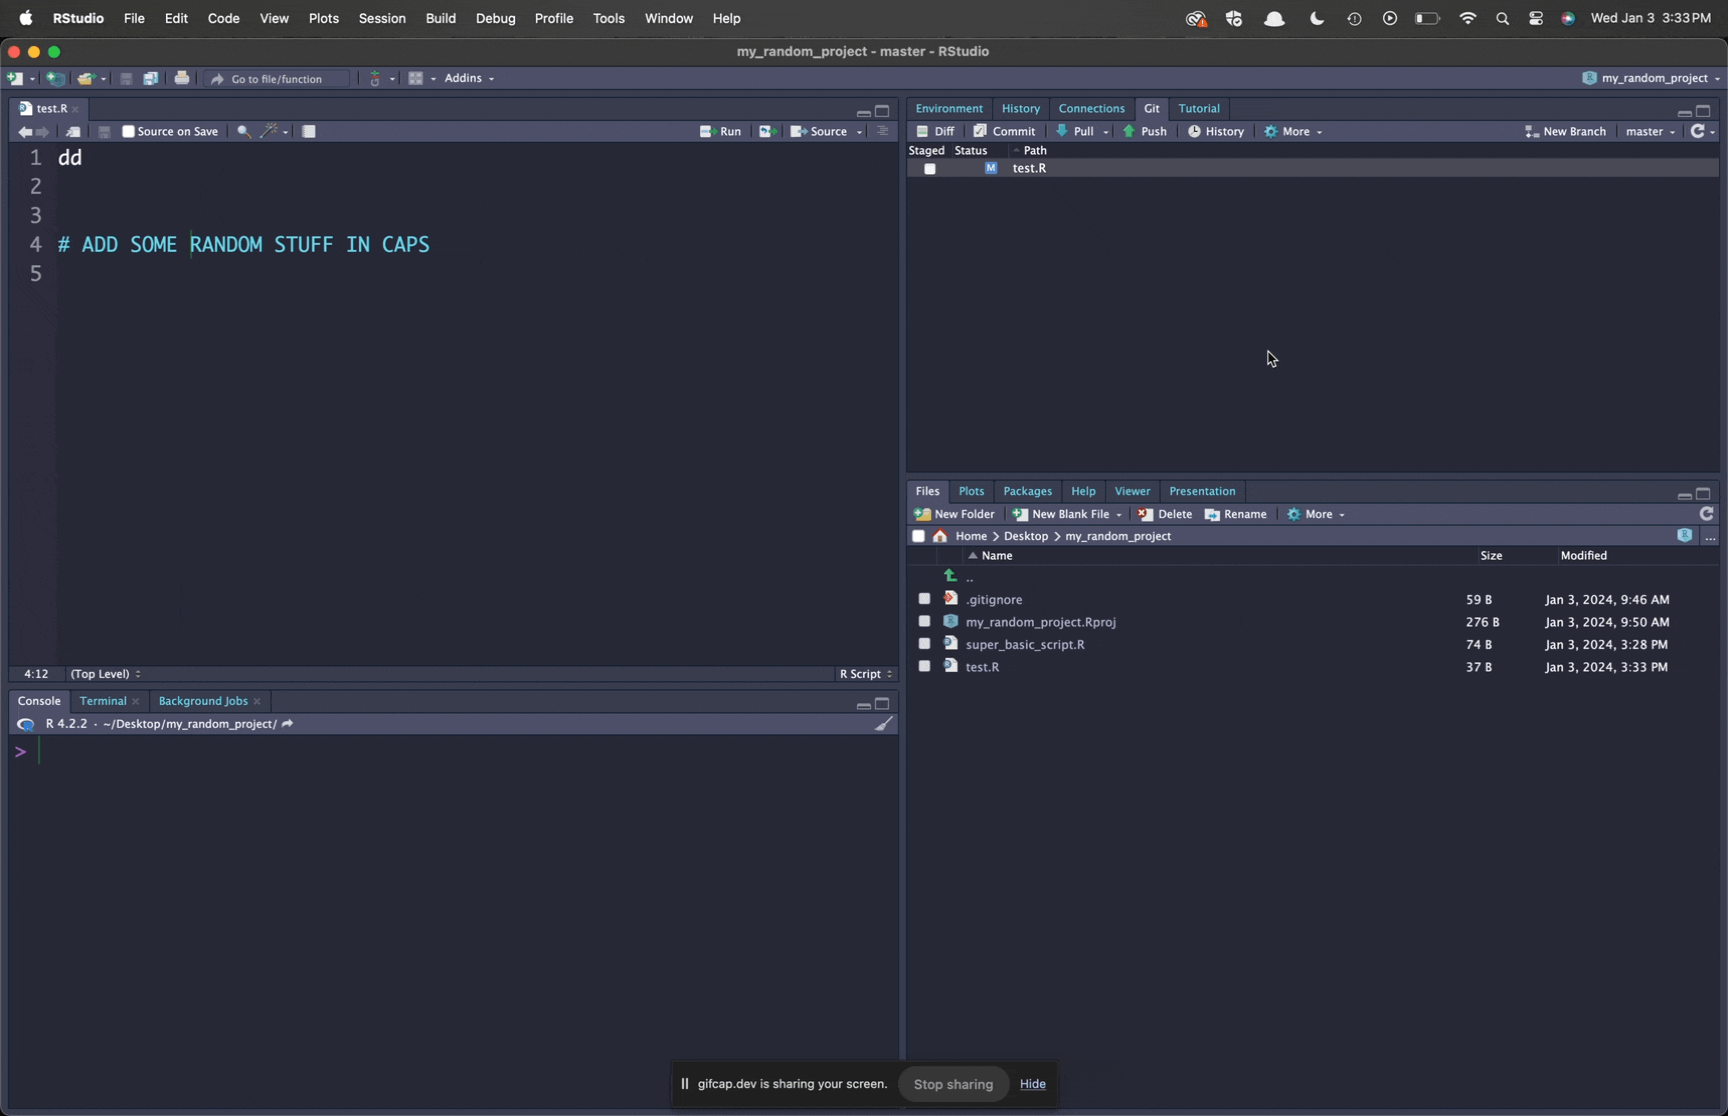
You will be able to see files that have changes to them (or new/deleted files) in the git tab in RStudio. This is git telling you that you have changes that are currently uncommitted. You may have noticed that at the end of Figure 2.7, there was one new file entitled git_example_repo.Rproj. This is the RStudio project file that was created when we cloned the repository. Lets go ahead and commit that now as I show in Figure 2.8.
Figure 2.8: Making a commit from within RStudio. Don’t forget to click the stage button and write a commit message. If you forget these two things, the commit won’t happen.
As Figure 2.8 shows, committing is as simple as clicking the “Commit” button from the git tab. You can then choose which file changes you want to commit by clicking the “Stage” check box. You also must write a commit message. Notice how I then use the “History” dialog to check to make sure my commit went through. That is all there is to it. If you make it a practice, it will become habitual.
Lets linger for a moment on the commit message that I wrote. A good commit message should be short and start with a verb (whether past or present tense I leave to you). Make it a practice to start all of your commit messages with verbs and to explain briefly what the commit does. Don’t be in such a hurry that you just starting writing “stuff” or “things.” Again, your future self will not appreciate it.
Committing is Local Only
Remember that all you are doing when you commit is telling your local git repository to commit the changes to its repository. You are not interacting with the remote repository at all. We do that later using a push. It is common for students to tell me they made a change that I should be able to see it, but I cannot see it because they only committed and did not push.
Pushing Changes
Now that I have made a commit to my local machine that the remote does not have, I am “ahead” of the remote repository. You may have noticed in Figure 2.8 that the git tab told me this as well. The next step in the basic git workflow is to push all of my new commits up to the remote repository. Luckily, this step is super easy. On the git tab, you will see a green up arrow. Clicking that button will push your changes as shown in Figure 2.9.
Figure 2.9: Pushing changes to my remote repository is as simple as pushing a button.
Although this process is usually simple, there is one important issue you may encounter that thankfully has a simple solution. The remote repository may also contain work that you do not have, possibly by a collaborator. If it does, you will not be allowed to push until you have pulled down those changes. When you try to push, you will see a message to this effect. The simple solution is to first pull (as described below) and then you will be able to push.
Pulling Changes
If you are working with collaborators, they may also be pushing up changes to the remote repository. You won’t automatically have access to those changes until you pull them down from the remote repository. Again, as Figure 2.10 shows, this is as easy as pushing a button.
Figure 2.10: Pulling changes from the remote repository is also as simple as pushing a button.
As you can see from Figure 2.10, there were no changes to be applied in this case. If there were changes my files would now reflect those changes.
One important issue you can run into when you pull is a conflict. A conflict occurs when you have made a commit to your local repository that changes the same line of code as another commit you pull down from the remote repository. When this happens, you will need to resolve the conflict on your local machine and then commit and push the resolution. Generally, conflicts can be avoided in bigger projects by branching and pull requests which I discuss below in the Advanced Git section.
Thinking in Git
I know that git can seem confusing if you have never used anything like it before. However, learning the basic workflow is surprisingly easy and if you truly embrace a git way of thinking, it can dramatically improve your research practices. Below I describe some ways that you can start to “think in git” to improve your practices.
Stop Making Messes
Academics often practice a form of version control that I call “horizontal version control.” You want to try something out but you aren’t sure if it will work out. So, you make a copy of the file and ad something like “V2” or the date or some other way of tracking differences. Although it may seem initially like an easy and quick fix to a problem, this approach will lead over time to a very messy workspace. Your directory will be littered with nearly identical scripts all with slightly different names (and an often inconsistent version naming system). Figuring what is what can become nearly impossible - only you know the correct way through this thicket of scripts and files to produce your results. And over time, even you may forget how to navigate the jungle.
This approach to version control is fear-based. The fear is that if we make changes to an existing script we may lose something valuable and the new thing that we are trying may not work. The illustration at the top of this chapter uses the analogy of rock climbing. Your fear comes from the fact that you are scaling a cliff without any protection. But if you practice proper “vertical” version control, then you can code without fear. Every change to your project has been recorded in the git repository and can be retrieved at any point. Your commits are like your pitons - you can always fall back on them.
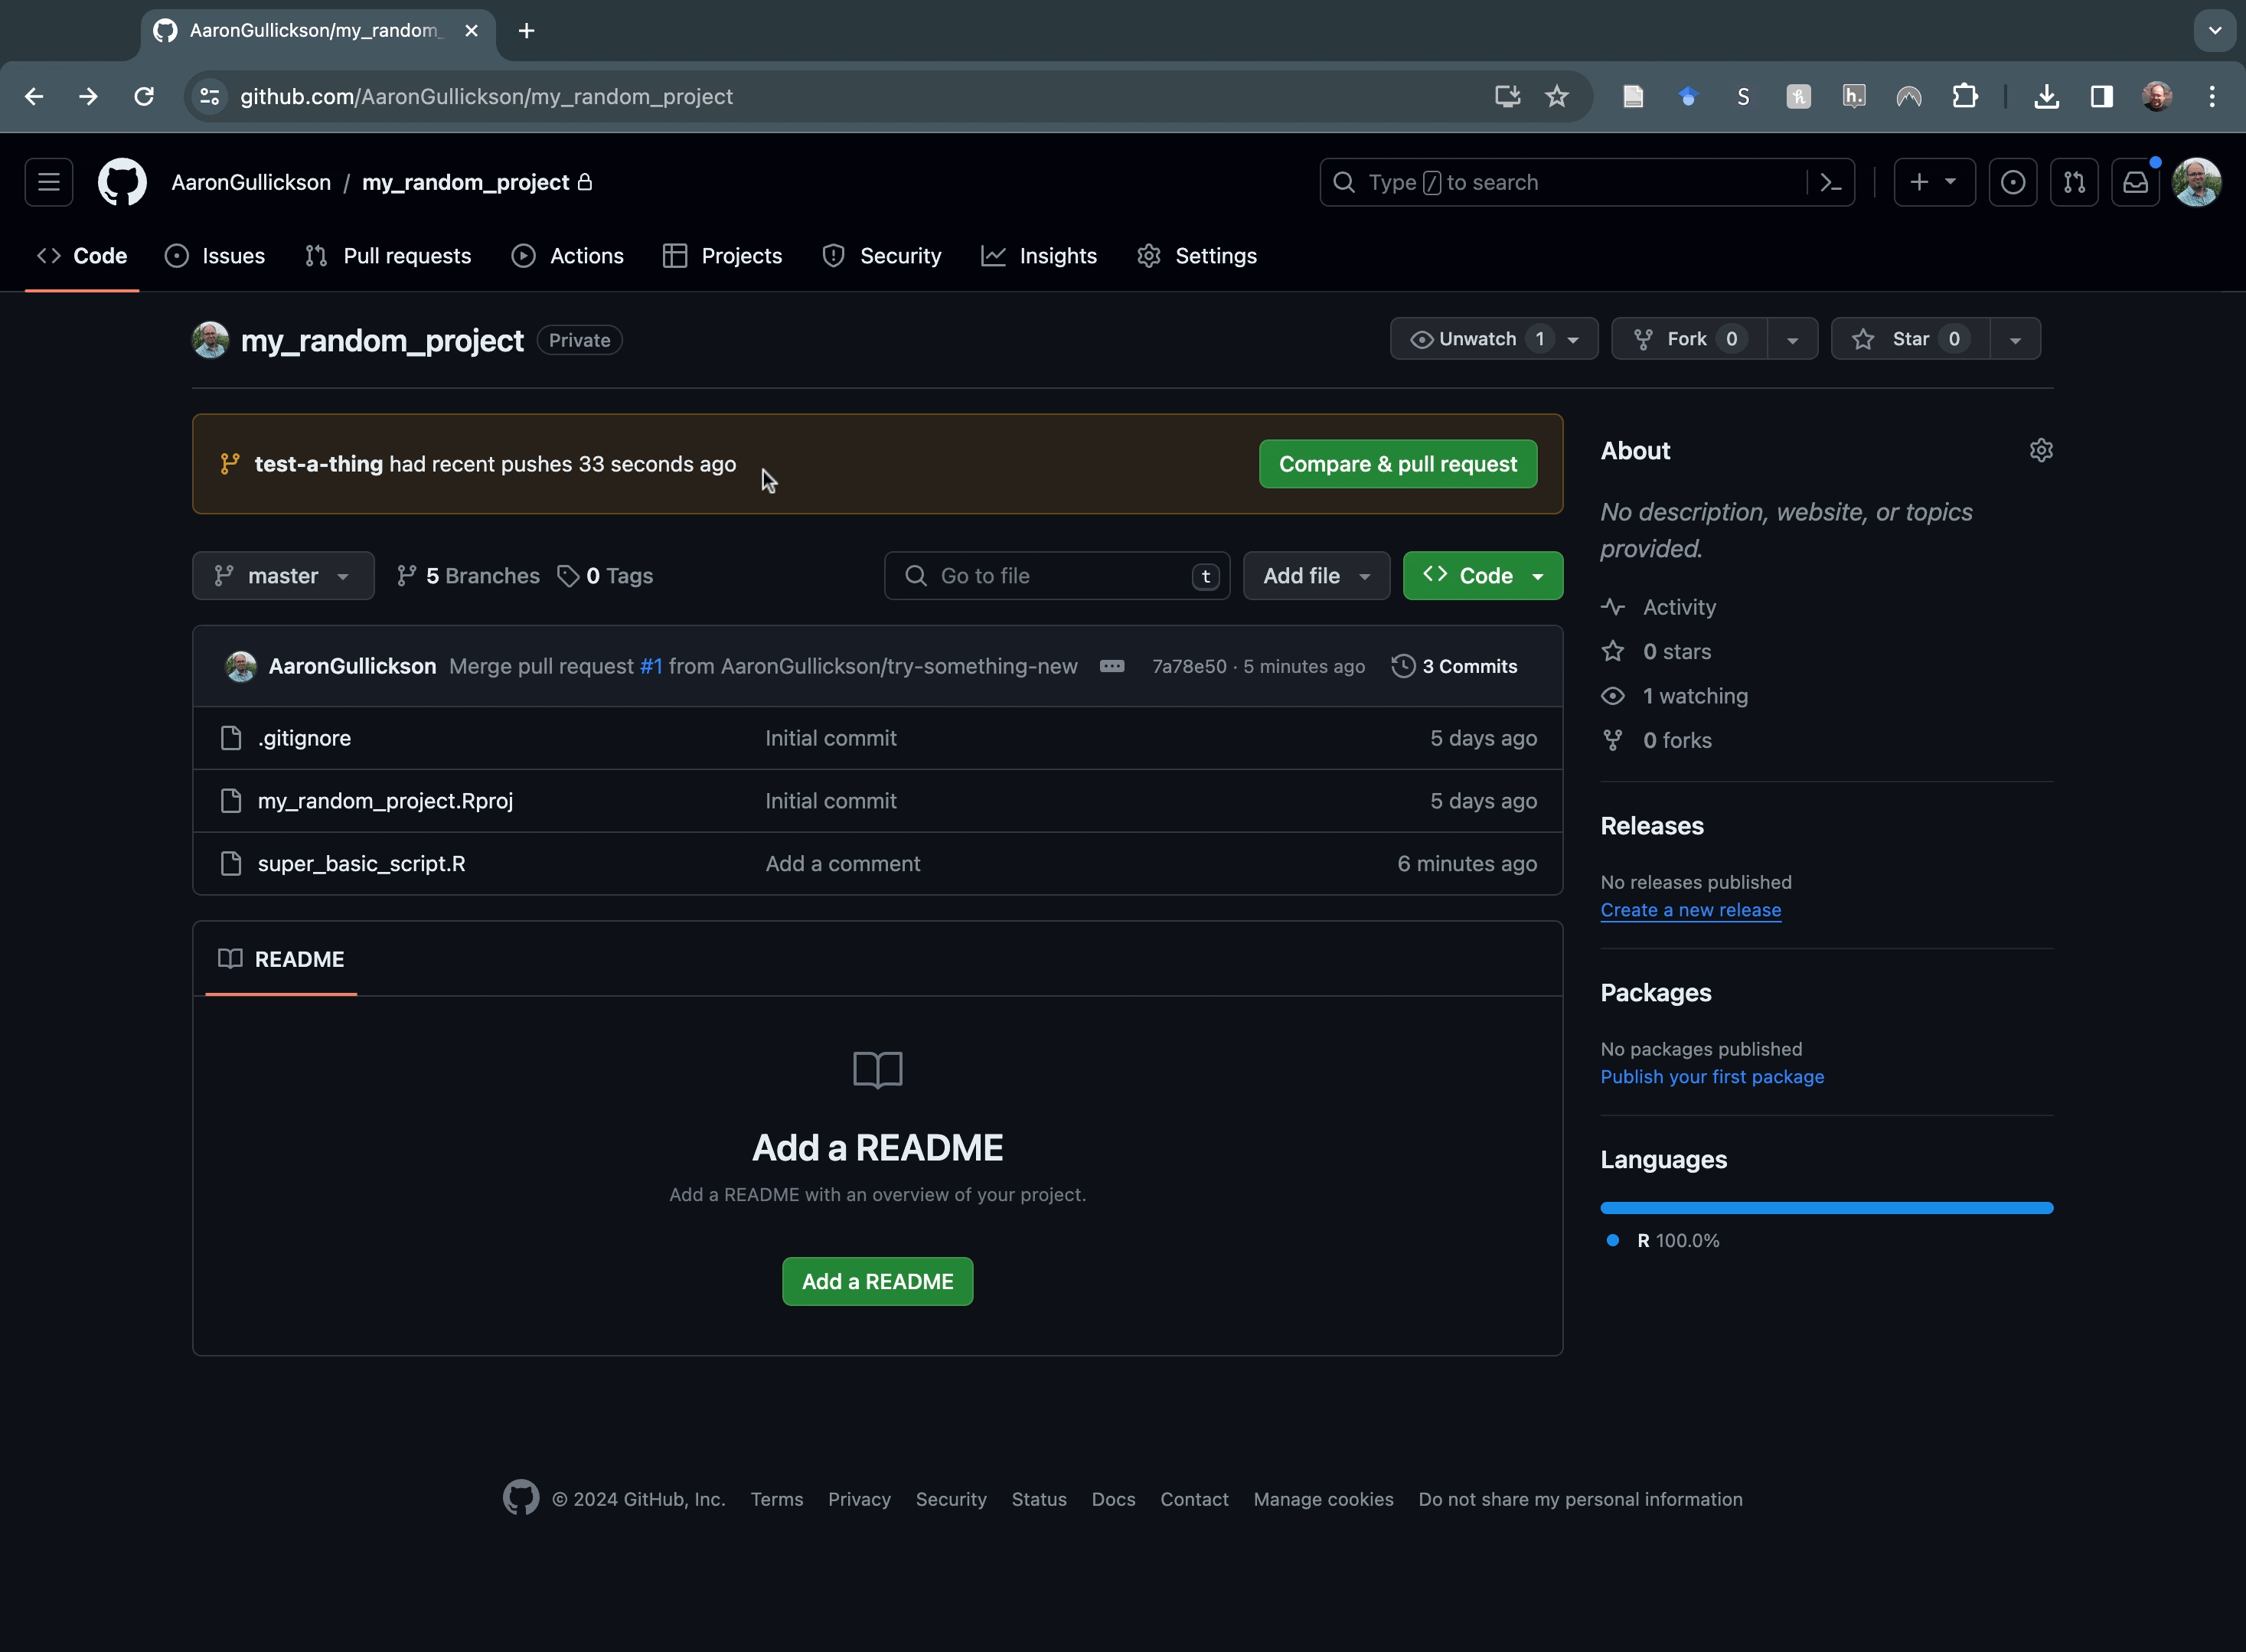
In fact, let me show you two ways you can recover your project state at any point when you use git. Figure 2.11 shows how you can use GitHub to browse your project at any given state. You simply click on the commit history and then the <> icon for a given commit and you will be able to browse your project as it was at that state. Nothing is ever lost.
Figure 2.11: You can browse your project at any commit state on GitHub.
Second, if you are trying to do something with a script and you decide you don’t like it, you can very easily roll back the state of that script to the last commit. Figure 2.12 shows you how to do that in RStudio.
Figure 2.12: You can roll back changes in your script to the last git commit by right-clicking on the file in the git tab and selecting “Revert.”
There are other ways that we can recover changes to, some of which are covered in the Advanced Git section below. But the fundamental lesson is that you should never make duplicates of files because you are afraid of losing something. Git has your back and that allows you to maintain a minimalistic project directory with only the files you need.
Work Discretely
What do I mean by discrete? I mean that you should organize your work with a care to producing logical and thematic commits to your repository. These commits can often be small, and there is power in the feeling of a small victory when you push that commit button. By thinking through your to-do list in terms of “what commits can I do today?” you can organize your work more efficiently. As you get used to this style of work, you will find that you will begin to habitually organize your thinking into small discrete tasks.
Plain Text is Better
Version control systems like git work best when your files are written in a simple plain text format rather than as binary files. Git can get inside of a plain text file and document changes line to line. Git can only tell that a binary file was changed, without information about the changes within the binary file. This makes is much easier to log, document, and merge changes in plain text files than in binary files.
All of the scripts that we typically write are plain text files. A lot of the datasets that we use (but not all) are in plain text CSV or fixed-width format. Most academics, however, are more familiar with writing their papers in a WYSIWIG document processing format like Microsoft Word, which saves files as a binary. You can still use binary documents like Word documents in a version control system but will not see as much benefit. To fully embrace the git approach to project managagement, you should use plain text documents whenever possible. Later in this book, we will learn how to write papers using Quarto which will allow you to use plain text throughout your project, including for writing manuscripts and making presentations.
Advanced Git
The information above gives you a basic foundation for working with git, but as you develop your skills you will likely want to know how to do more with git. You can revisit this section to learn more about some advanced git features.
Setting Up a Local Repo
I showed you above how to clone an existing repository from GitHub to your local computer. What if you have an existing local project directory that you want to turn into a git repository with an associated remote repository on GitHub? It turns out that we can do this very easily with the usethis package.
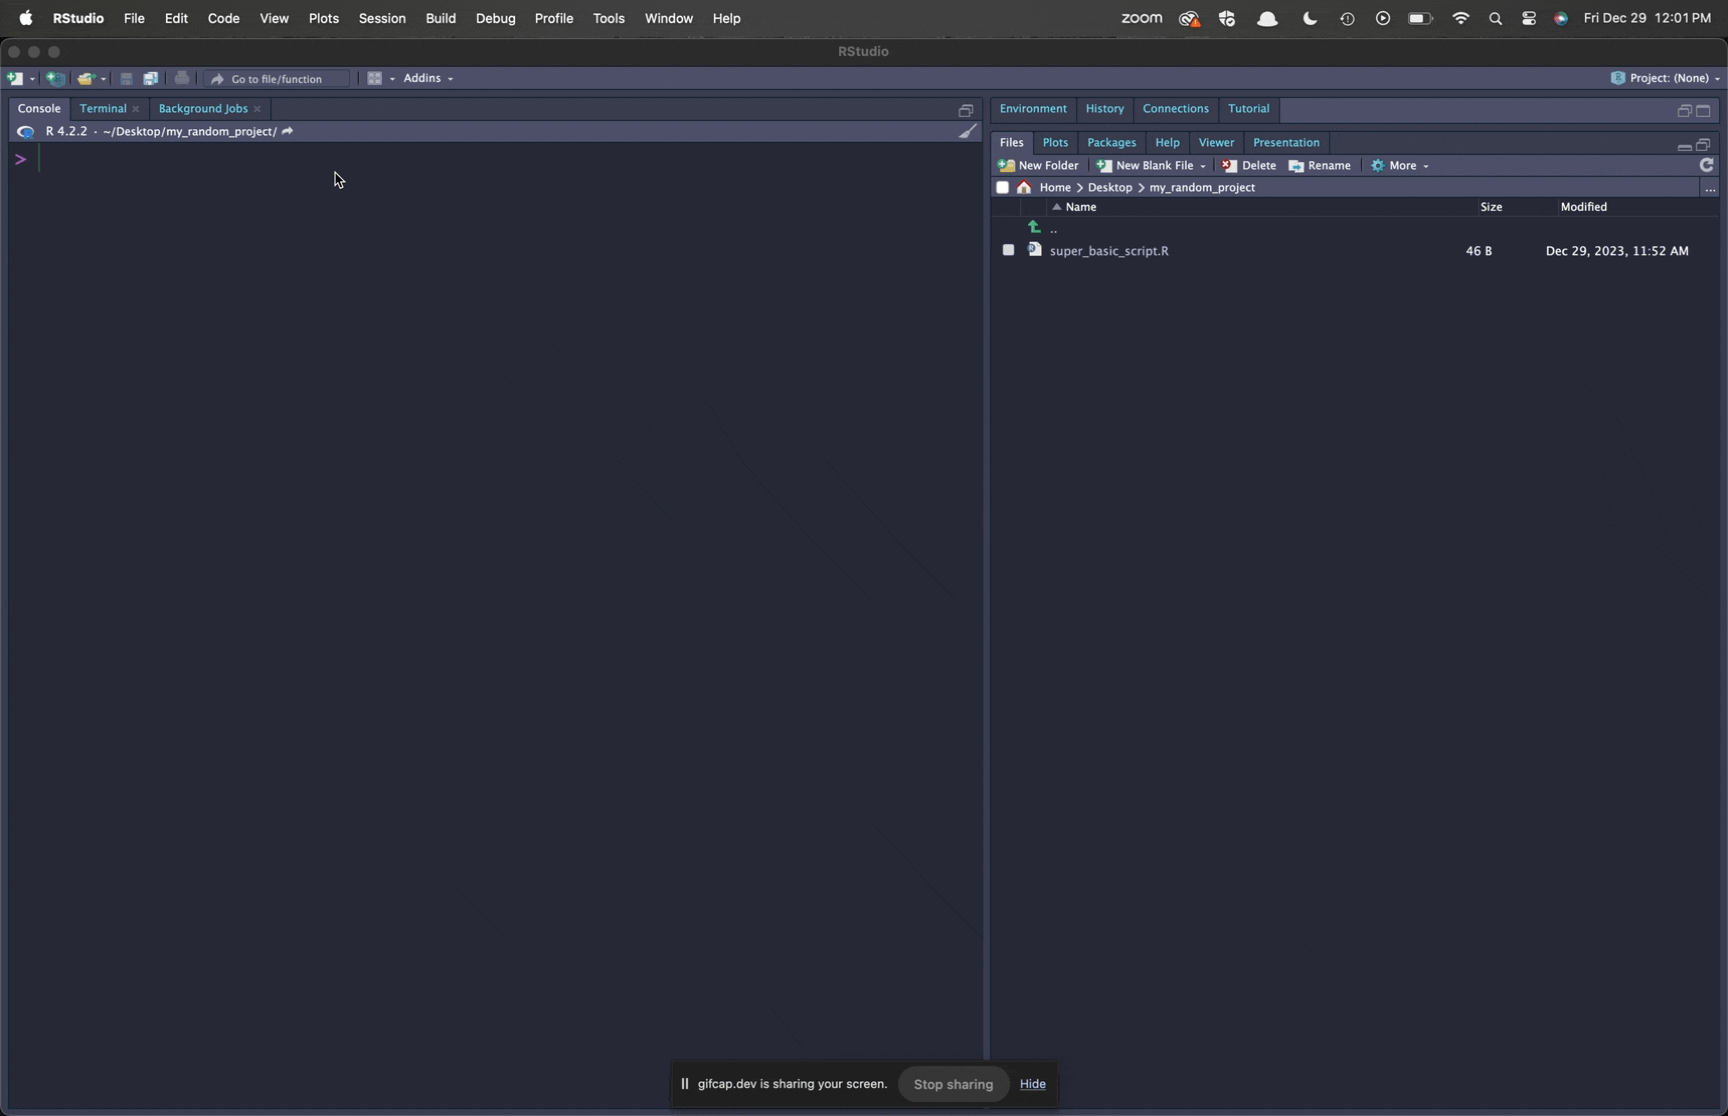
I am assuming that you already have an existing project directory on your computer with associated scripts and data files. The first step is to navigate to your project using the Files tab in RStudio and then to set this directory as your working directory. Figure 2.13 shows you how to do this with an example.
Figure 2.13: You can set the working directory for your project from the “More” button in the Files tab of RStudio. The current working directory will appear above the R console.
Now that we have the working directory set up we can use commands from the usethis package to do the following:
usethis::create_project(".") to turn the working directory into an RStudio project.
usethis::use_git() to initialize a git repository for the project. You can choose from the prompts presented to have all files committed in an initial commit, or you can make the first commit yourself manually.
usethis::use_github(private = TRUE) to create a GitHub remote repository and push your commits to it. You can set private = FALSE if you want to make it public.
Figure 2.14 shows the entire process in action. Note that usethis will also create a .gitignore file and an Rproj file as part of this process.
Figure 2.14: Turn a project directory into a local git repository and create a mirrored remote repository on GitHub. Make sure you are in the correct working directory before you start.
With these tools, its almost too easy to create a new git repository. However, in practice, I would recommend that you start new projects from GitHub and then clone the project down rather than start local and push up, because you can create a template repository on GitHub and then use that template to create new repositories on GitHub. As an example, you can view the template that I use to start all of my research projects. Just by clicking the “Use this template” button on that page, you can create your own repository with this basic project skeleton. To create your own template, you can just turn any repository on GitHub into a template from the repository settings tab.
Branching and Pull Requests
So far, I have shown you how to commit and push your changes. But what if other people are also making changes, committing, and pushing them? Sooner or later, you will run into a conflict where two different commits change the same line of code. Such conflicts can be resolved, but the easier approach is to avoid them in the first place by branching and pull request. If you are working on a solo project or one with a clear division of labor, branching might not be necessary. However, if you are working on a project with even a small number of collaborators contributing code, you should probably branch and use pull requests to make changes. If you are taking a course from me, then the primary way you will see pull requests is when I make corrections to your code.
By default, when you commit to your git repository, you are working on a “main” or “master” branch. This is the default branch, but at any given commit you can create a separate branch of the code and make commits to it. Once you are satisfied with your code, you can then merge the changes in that branch back into to the main/master branch (handling conflicts at that point). In practice, most people do the merging via a pull request on GitHub. Figure 2.15 visualizes a simple case of branching and merging.
Figure 2.15: Visualization of branching in a git repository.A separate branch is created off of commit 1-91f4729. Two commits are then made to this branch while an additional commit (4-10d346) is made to the main branch. The commits from the try-a-thing branch are then merged back into the main branch.
Creating and switching branches is easy in RStudio. The most important thing to remember is that you will always branch off of whatever branch you are currently on. So, always make sure you are on the main/master branch when you create a new branch (unless you are getting really fancy and branching off other branches). The git tab in RStudio has a dropdown menu of branches that will allow you to switch the branch. When you want to create a new branch just click the “New Branch” button in the git tab and name your branch. Figure 2.16 shows how creating branches works in RStudio.
Figure 2.16: You can use the tools in the git tab to create new branches. Note that RStudio will sync your new local branch with the same branch on your remote repo, so you can start committing and pushing right away.
When you are satisfied that the code in your branch is working, you can merge it back into the main/master branch. While you can merge your branch back into the main branch using command line tools, the easiest approach is to use a pull request on GitHub. On GitHub, you can create a pull request from any branch of your repository. This will create a web page for your branch where you can write a summary of what the code does and others can review the code. Typically, developers use this to review code before merging it into the main branch. One of the most useful features of the pull request is that it will tell you whether there is a conflict with the main/master branch before you merge. It will also offers tools to help resolve the conflict.
Figure 2.17: How to create and merge a pull request on GitHub. If there is a conflict, the button for merging will not be available. Remember to pull down the changes to your main/master branch after merging the pull request.
Figure 2.17 shows how to create and merge a pull request on GitHub. If you are taking a course from me, then the pull request screen will show you changes that I have made to your code along with a variety of comments that you can review. More generally, branching and pull requests are great for when you want to work on a large task that will likely take multiple commits. Even if you are working on a solo project, pull requests can help you keep different tasks organized and well-documented.
Don’t Forget to Pull after you Merge
When you merge the pull request on GitHub, the code is only merged into the main/master branch of the GitHub remote repository. To get access to all of that good code on your local repository, remember to switch back over to the master/main branch locally and pull.
Ignoring Stuff
In most cases, you will not want to commit every file in your project directory to your git repository (or “put under version control” to use git lingo). A few common cases are:
Junk files created by your operating system like the .DS_Store file that is created in OSX anytime you navigate into a directory in the finder, or the temporary backup files that are created as you work in Microsoft Office applications.
“Invisible” files like .Rhistory or .bashrc that are specific to your local system.
Files (often data) that due to privacy concerns you don’t want to share in the repository.
Files that are generated by scripts like image PNGs or HTML/PDF documents from Quarto.
You can just try to ignore these files in the git tab, but over time, your git tab will become quite cluttered with stuff you are not committing and it will be hard to track and easy to accidentally commit something you did not want to. The solution is the .gitignore file. This is a simple text file that lives in your project home directory and lists all of the files that are being ignored. The path to each file that you want ignored should be listed on a single line. You can also use globbing parameters to identify types of files or groups of files by wildcards.
Remember when I had you run git_vaccinate() way up above? That command creates a standard .gitignore file that is created any time you clone a git repository using RStudio’s new project feature. So, you should see a .gitignore file already on any cloned repo. That file will look something like:
You can add to this list any additional files you don’t want to be tracked. Lets say that you had some Word documents with the docx suffix that you want to be ignored. You can add another line with:
*.docx
The * will match any document in your directory with a .docx suffix. You will never see a Word document in your git tab. If later you realize you do want to track a word document you can remove this line (or comment it out with a #).
Another quick and easy way to ignore a document is to right click on it in the git tab. This will bring up a context menu with “Ignore” as one of the options. This will add a line to your .gitignore file to start ignoring the file.
You Cannot Ignore What You Already Track
You can only ignore new files. If you have already committed a file to your git repo, and then later decide to ignore files of its type, changes to that file will still be noticed by git and it will show up as modified in your git tab. The only way to stop tracking files that you are currently tracking is with some more advanced git commands that are beyond the scope of what we cover here.
The important lesson to take from this is that you should be careful about what you commit. You only want the important stuff up in your repository not the junk, so don’t just mindlessly check everything into version control.
Using the Command Line
I have shown you how to use git through the RStudio interface, but at its core, git is a command line driven program. Just like R, you execute commands by typing them into a console interface. All of the tools in RStudio are just a graphical tool for running that underlying command line interface. You can also interact directly with git from the command line. In most cases, you don’t need to do so to do basic tasks, but for more complicated git commands, you may need to use the command line. Thus, it pays to know how to use it.
You can’t type git commands from the R console - git commands are run directly from the command line of your operating system. On an OSX or unix-based machine, you can open up a “terminal” to run such commands. The equivalent on Windows is the DOS prompt, but git is designed to work with a unix-style command line interface. So instead of the command line, git installs a program called “git bash” onto Windows machines that can be used to run unix-style commands.
The easiest way to access the prompt you need to run git commands is within RStudio. In the lower left panel where the R console lives, you will also see a tab for a “Terminal.” If you click on this tab, you will now have access to the operating system command line and you can use it to run git commands (among other things).
Generally, this terminal will have the same working directory as your R console. This is important because git commands should be run from the top-level directory of your repository. You should see the path of your working directory at the top of the terminal. If its not correct, be sure to change your working directory.
All git commands are at least two words and start with “git.” Here are the most important git commands and how to use them.
git status
Probably the most used command, this command will give you a report of the current status of your git repository, including modified or new files that need to be committed.
git add
This command will stage files for committing. Its like pushing the checkbox button in RStudio. The command needs to be followed by the names and paths to all files you want to commit. You can use * wildcards to stage multiple files at once. Using git add * will work to add all new and changed files, but is considered bad practice as you can easily end up committing junk files.
git commit -m "A commit message"
This command will commit files that you have staged. Note that if you have not run git add yet, this command will have nothing to commit. I use the -m flag to add a commit message here. If you don’t, you will end up in a vim text editor (by default) for writing the commit message. Unless you are a real nerd, you want to avoid this, as the vim text editor is infamous for being inescapable.
git push
This will push commits up to your remote repository. Technically, you should tell it the name of your remote repository, which will usually be “origin” and the name of the branch you are pushing. However, in most cases you should be set up to already push to origin by default and you will push from your current branch, so generally git push will work.
git pull
This will pull down commits from your default remote repository into your current branch.
git log
This command will return a history of your commits starting with the most recent one. To get a more compact display of this history you can use the --oneline flag for git log --oneline.
git branch
List all your branches with the current one marked by an *.
git checkout branch-name
Switch to an existing branch. If you want to create a new branch add a -b flag like git checkout -b branch-name.
git merge branch-name
Merge commits from branch-name on to your current branch. I would recommend you generally use pull requests to merge instead.
git remote -v
This will list your remote repositories. It can be useful if for some reason pushing and pulling aren’t working.
Figure 2.18 shows how to use the command line interface to commit and push a change.
Figure 2.18: Committing and pushing changes from the command line within R. Note that you may need to use the refresh button on the git tab to get up-to-date information after using the command line.